
More Fun With Lasers! Land Cover Map of Wisconsin
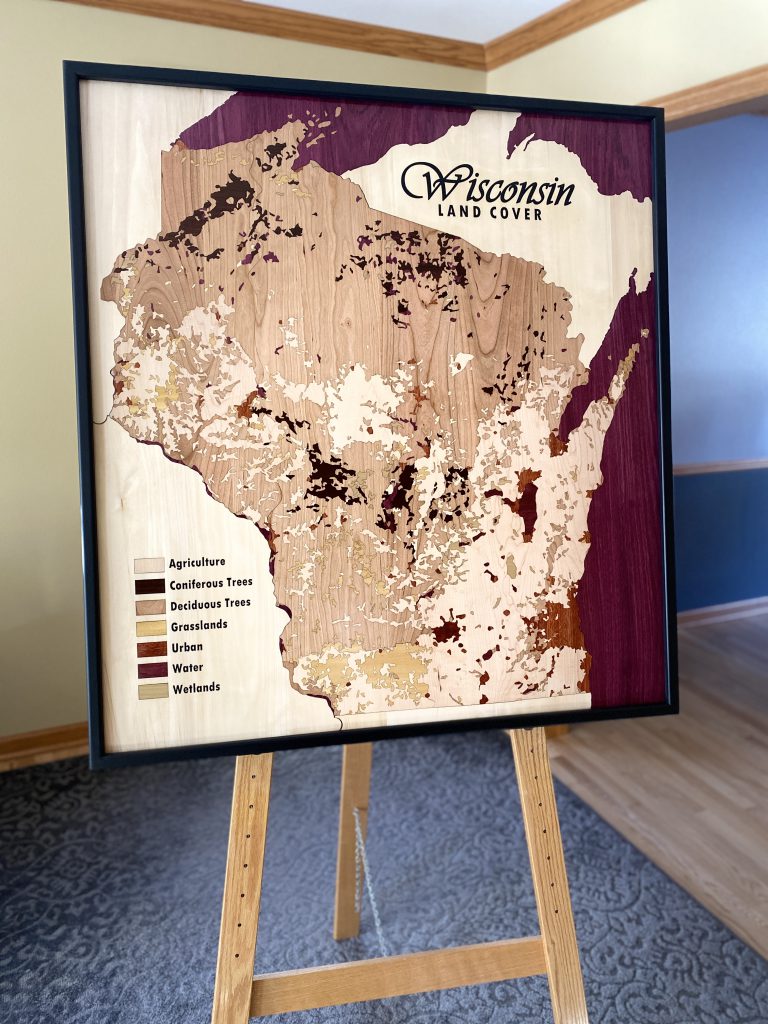
Based on my experience with the “3-D” Lake Waubesa map, I thought, “what can I do to take laser cut mapping to the next level?” I worked on a statewide land cover mapping project in 2014-2016, so that got my proverbial wheels turning. That random thought turned into an adventure making a map from 1,100+ pieces of laser-cut wood. Each land cover type is represented by a different wood species. I didn’t want to use any sort of artificial dyes or stains, so yes, that means the water is purple!
If you are unfamiliar, land cover is the stuff that covers the ground (trees, water, wetlands, etc.), whether that is natural our human-made. There is often confusion between land cover and land use. An example of land use is “golf course,” while land cover for that particular land use might be “cool season grass.”
The Result
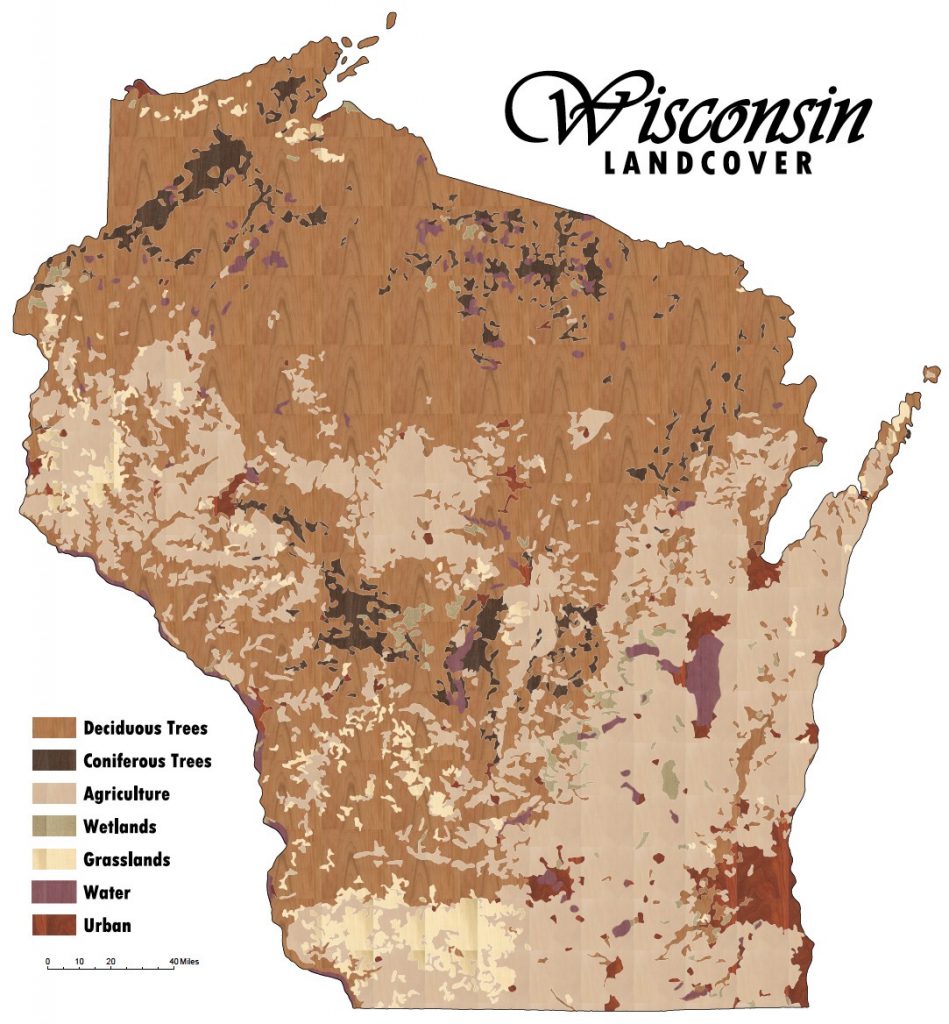
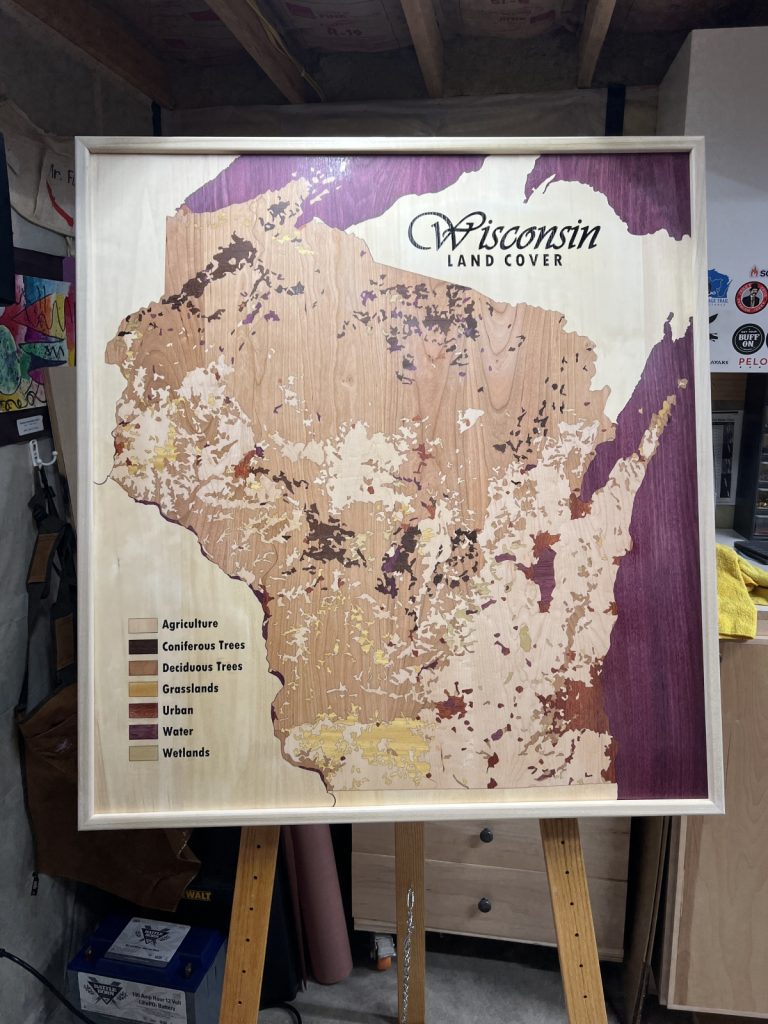
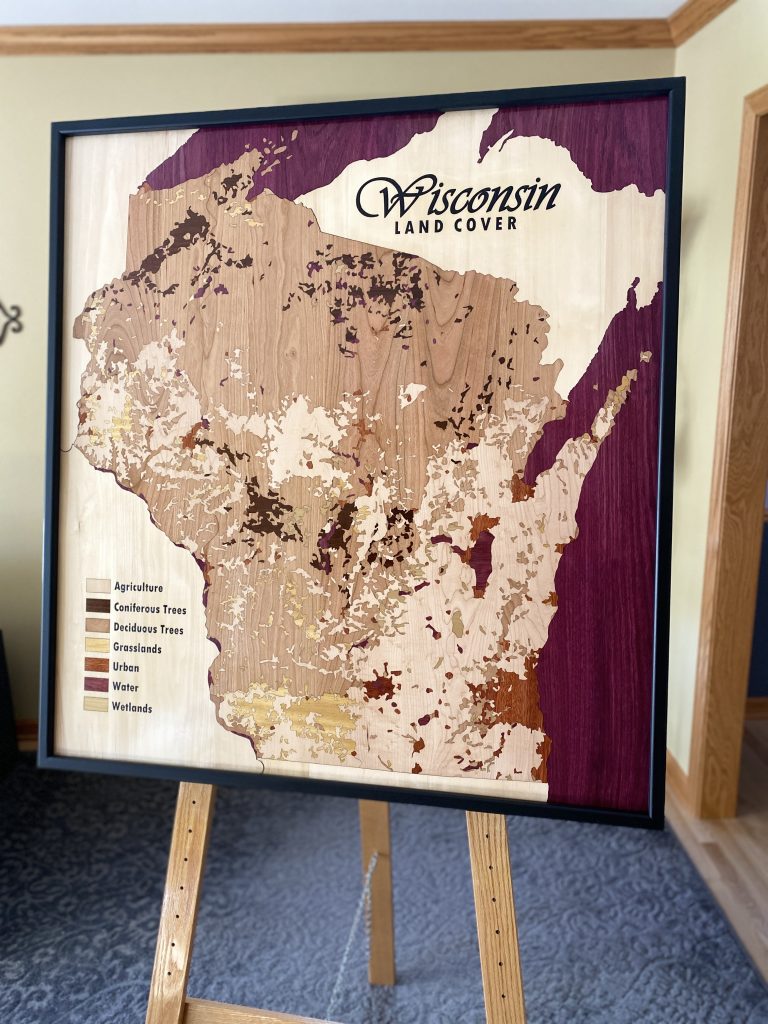
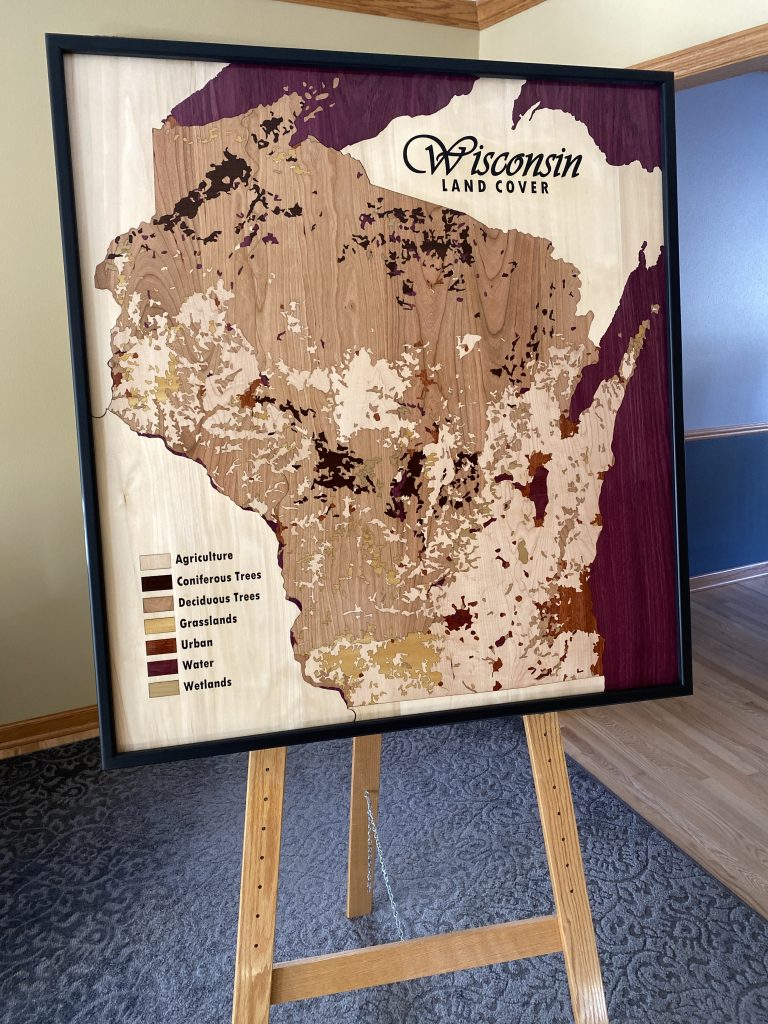
I’ll give you the bottom line up front. After somewhere around 250 hours of labor, below is what the final product looks like. Mistakes were made, but as a whole I’m very happy with how things turned out. Especially since I really had no idea how I was going to pull this off when I started the project!
The Construction Process
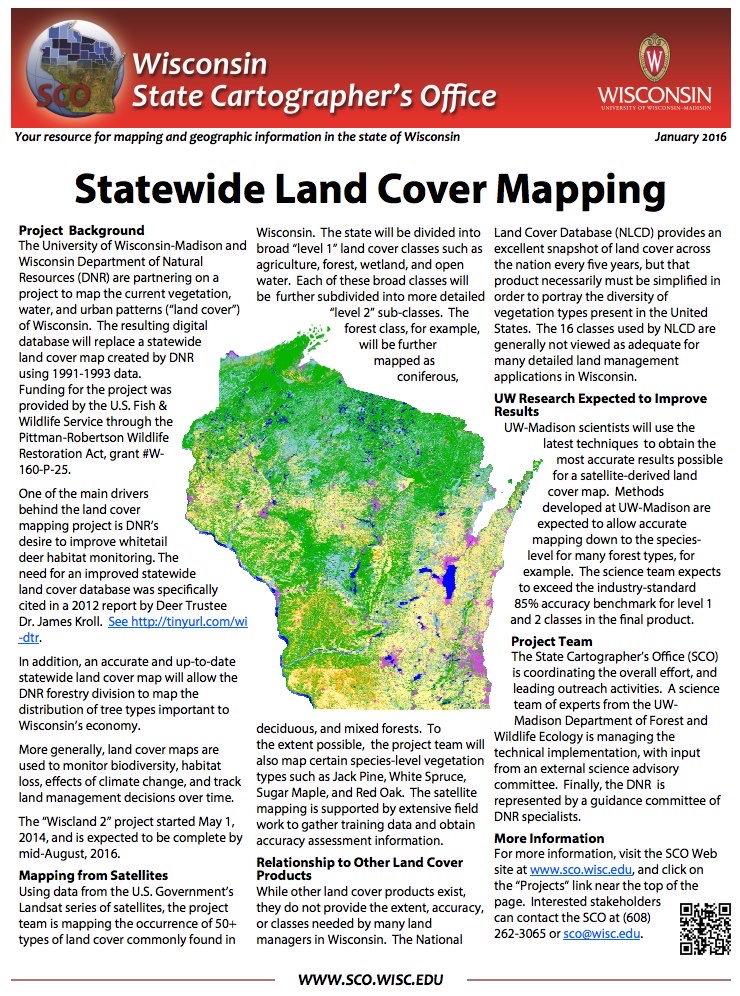
Below I’ve provided some background and (mostly) documented the steps involved in the process. This is Where the idea started. UW-Madison worked with the Wisconsin Department of Natural Resources a few years ago to develop an updated “landcover” database that is derived from satellite images… long story short.
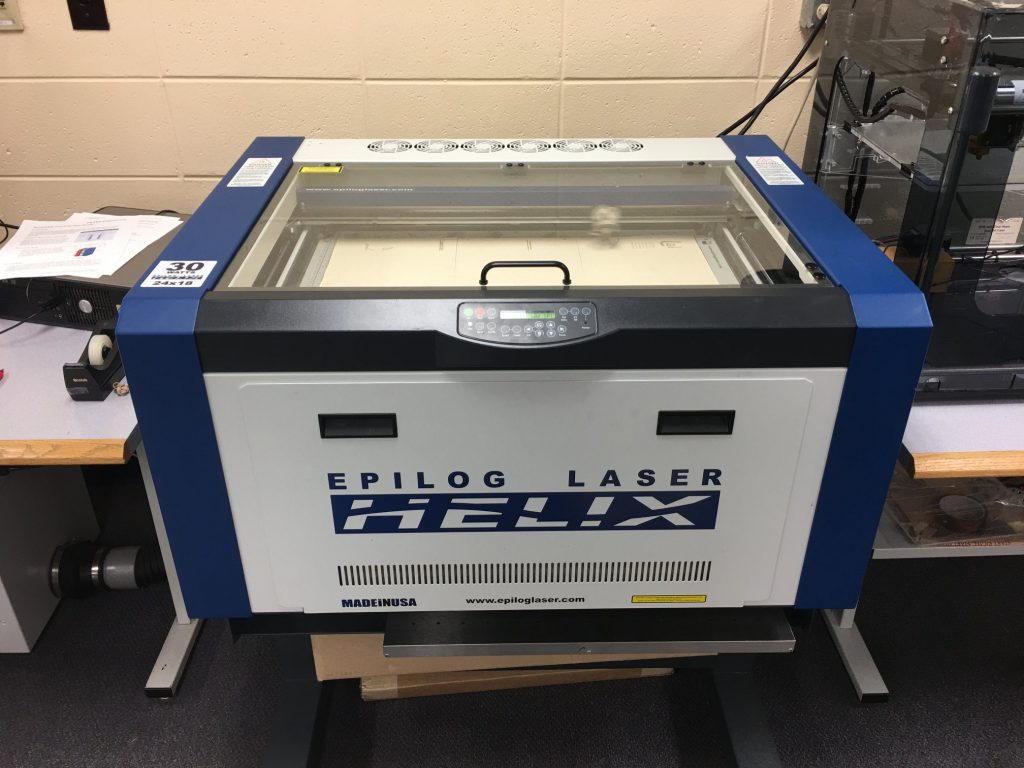
Laser at McFarland High School. Some backstory: In late 2016 I took a woodworking class at McFarland High School as part of an adult education class. When I found out they had a laser cutter I got permission from the instructor to play around with that instead of “real” woodworking.
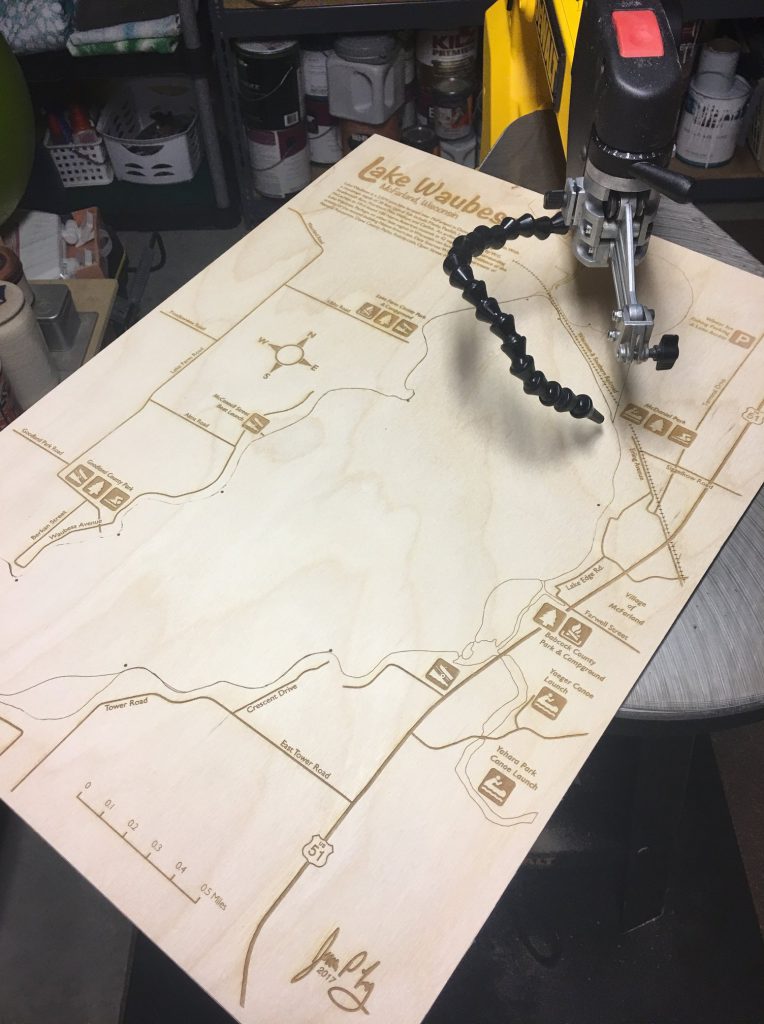
Engraving the Map for Lake Waubesa. …. okay, “3-D” lake maps aren’t actually that unique. Sort of like epoxy “river” tables… seems like a trendy thing that every woodworker tries at least once.
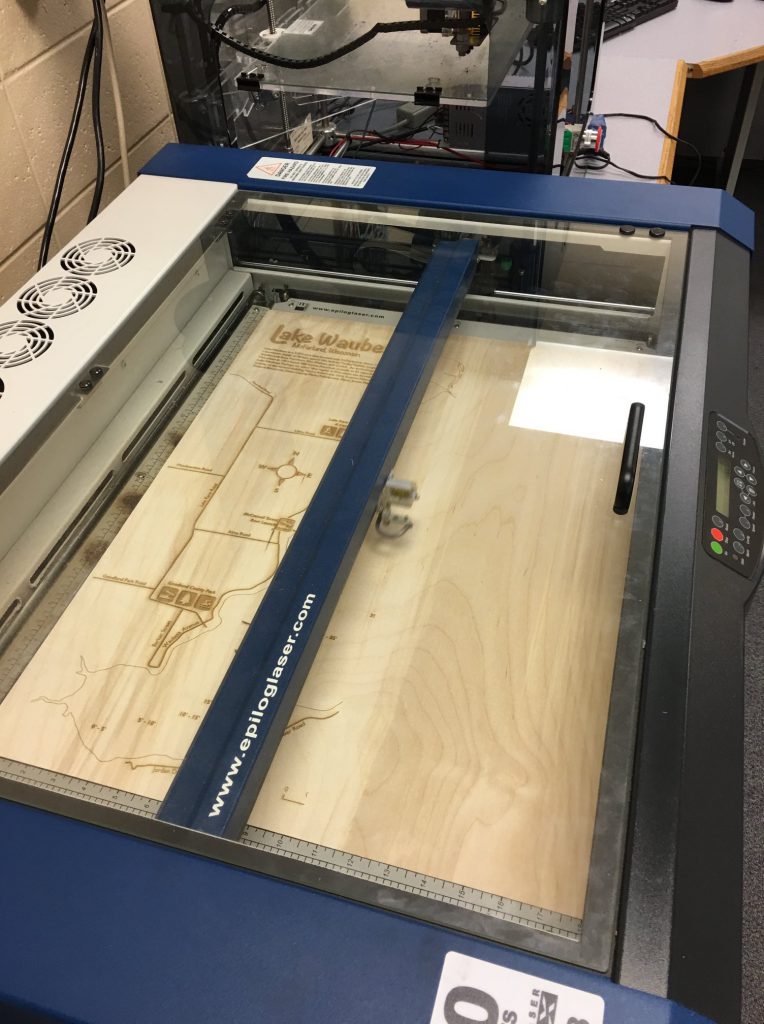
Need More Power! The laser at the high school didn’t have enough power to cut the lake map layers so that was done by hand on a scroll saw.
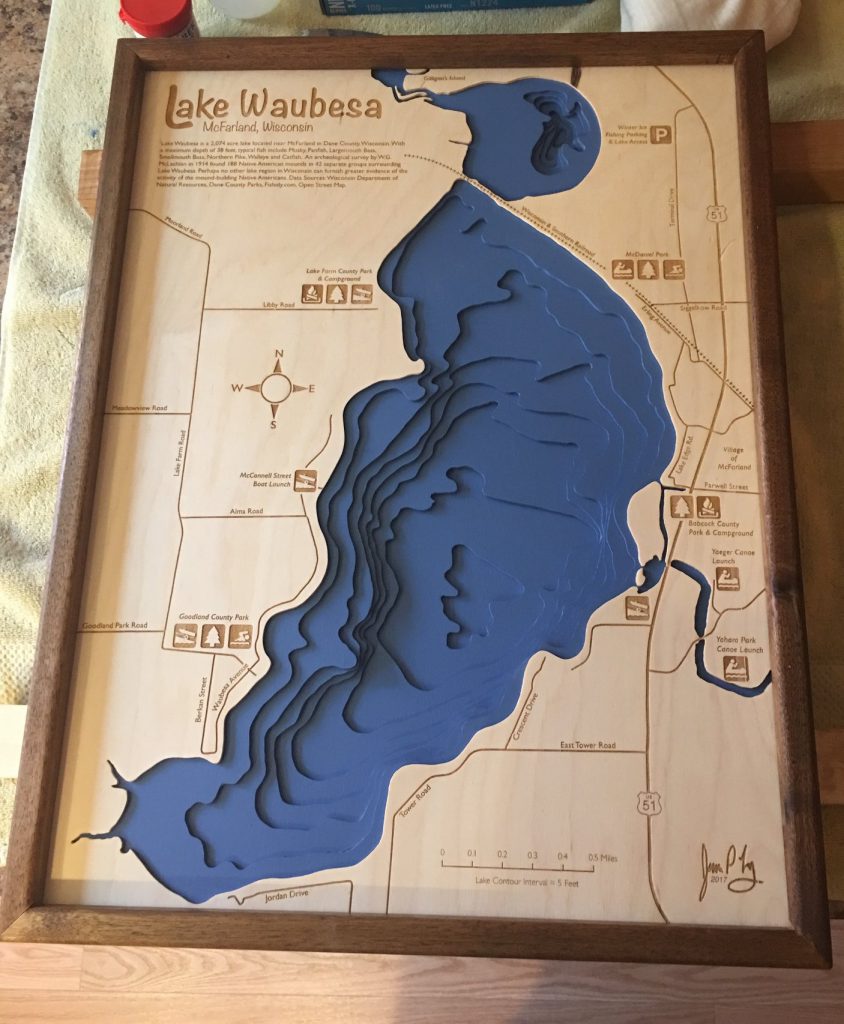
Lake Waubesa Map. The final product. I think this was version 3. Let’s just say mistakes were made with the first two versions.
Not so fast buddy. Fast forward to summer 2018: I heard the the high school had a new more powerful laser that can actually cut wood. So, I started to think more seriously about attempting the land cover map project. After some initial planning and background work, I show up for first class in the fall of 2018. “Yeah, we have some ventilation problems with the new laser. Sorry, you won’t be able to use it.” Plans go on hold.
University of Wisconsin-Madison Makerspace. Fast forward again to October 2019. I learn that, as a UW-Madison employee, I am eligible to use the “makerspace” developed by the UW College of Engineering. Hmm….

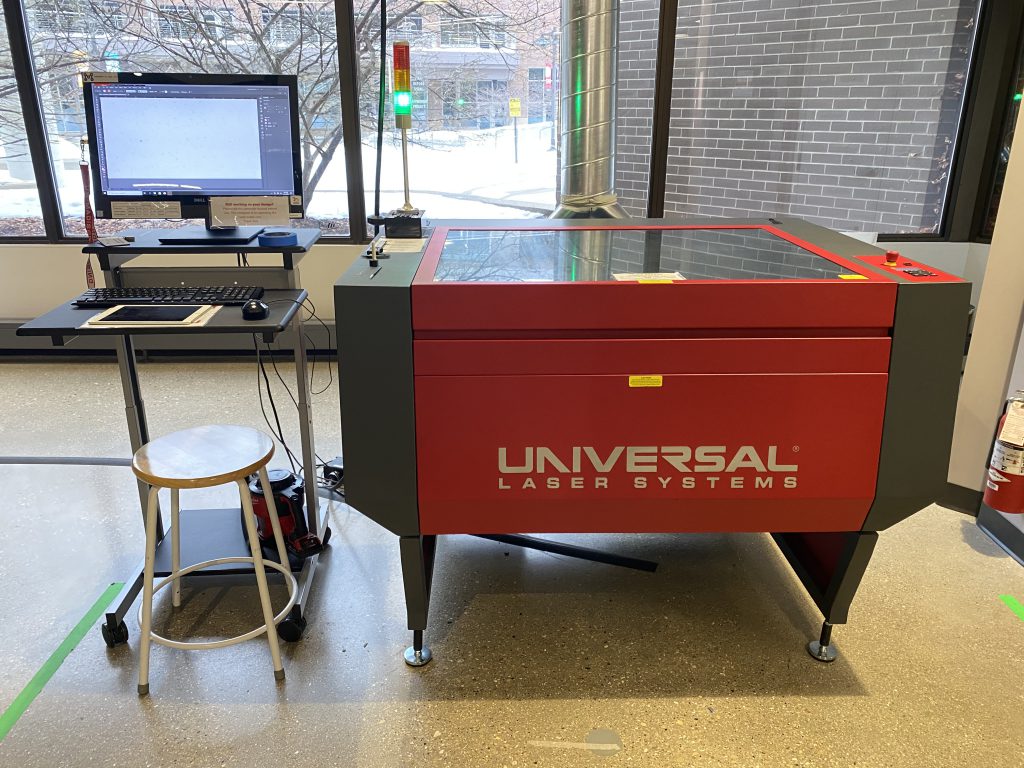
150 watt laser at UW-Madison Makerspace. You can probably guess where this is going next. Turns out that among the other amazing resources the College of Engineering makes available to staff and students they have a powerful, well-maintained laser that has the oomph (150 watts) to cut way more than I’ll ever need.
Before we continue, what is land cover? This is a statewide view of the land cover database at “level 1″… the most generalized, simplest way of looking at land cover.
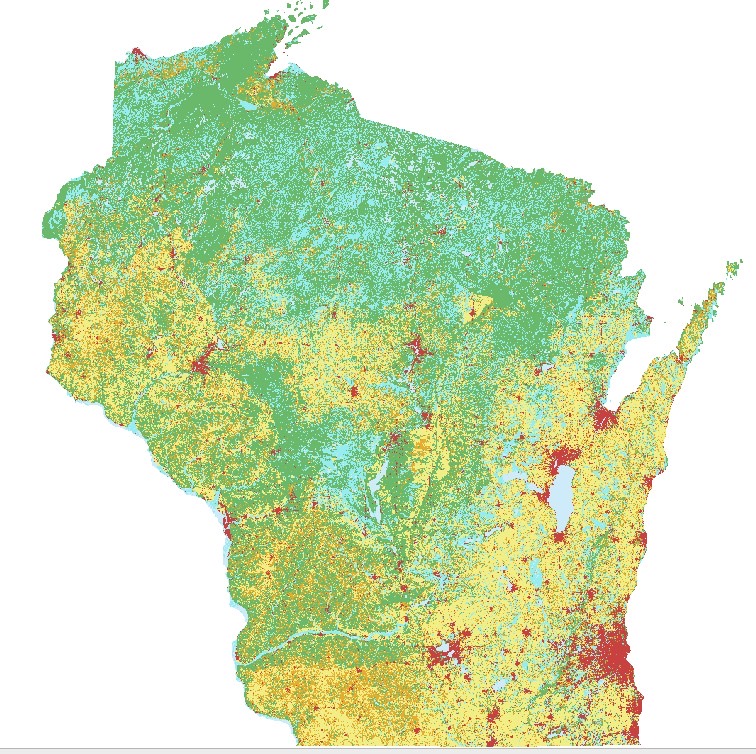
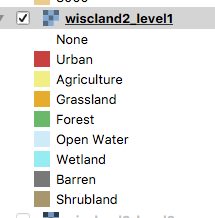
If we zoom in (Green Bay) you can see the amount of detail present. And this is the most simplified version of the data. Each raster pixel is 30 meters by 30 meters square. Each and every one of those pixels has a land cover class assigned to it.
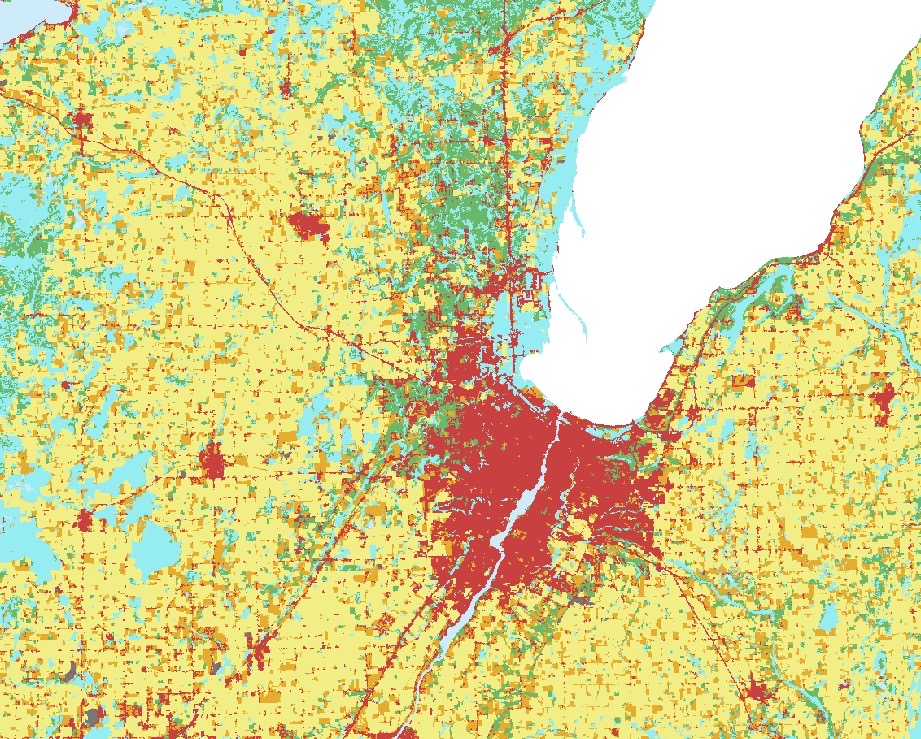
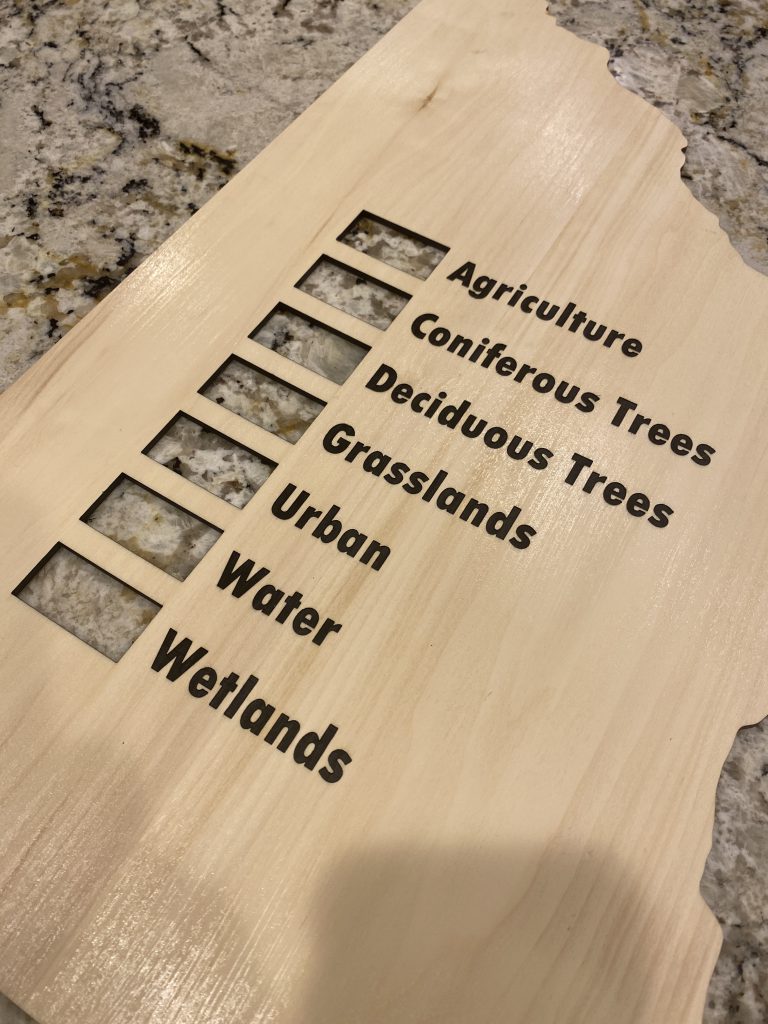
The “classes” for level 1 look like this. I took some artistic liberties. Simply stated, most of Wisconsin is agriculture, forest, or urban. Barren (ex: quarries) and shrubland cover very little ground by comparison. So those two classes were basically filtered out.
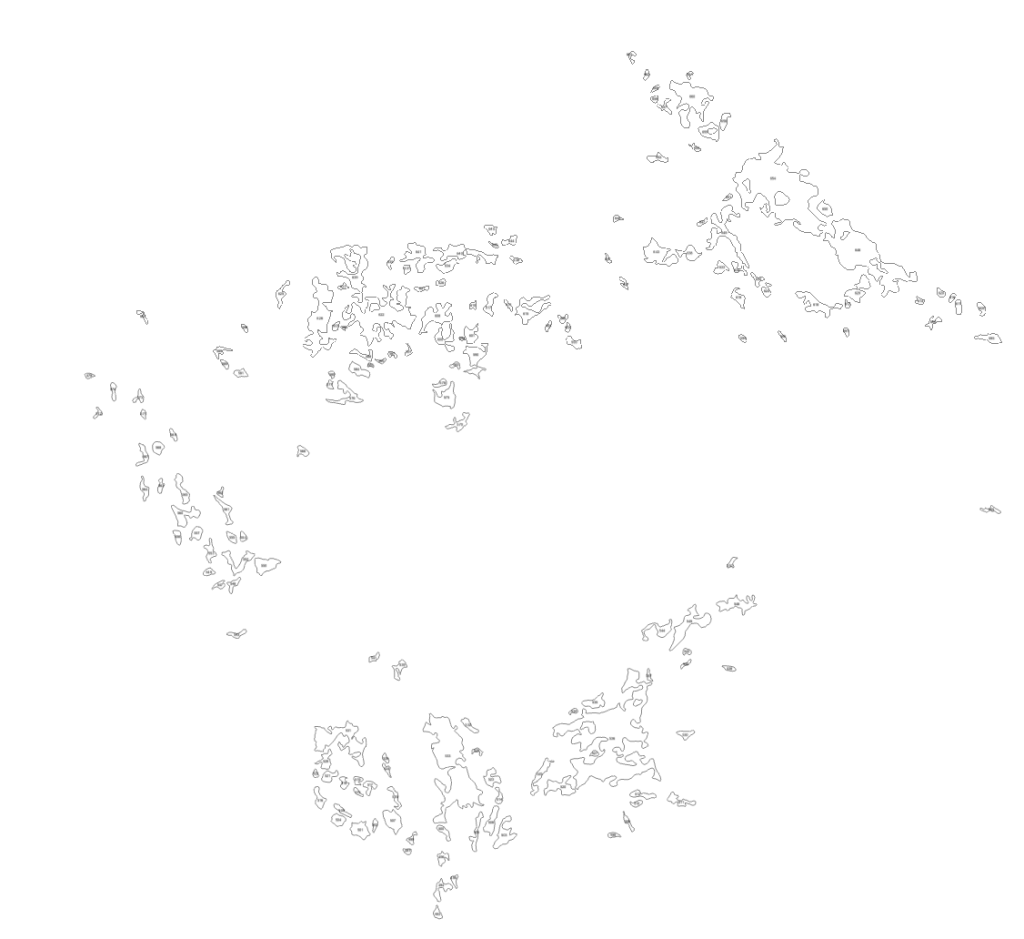
After much data wrangling, I produced a smooth vector file that could ultimately be used for cutting. This generally involved lots of pixel clumping, filtering, smoothing, running raster to vector conversions, a certain amount of manual editing, and more vector smoothing.
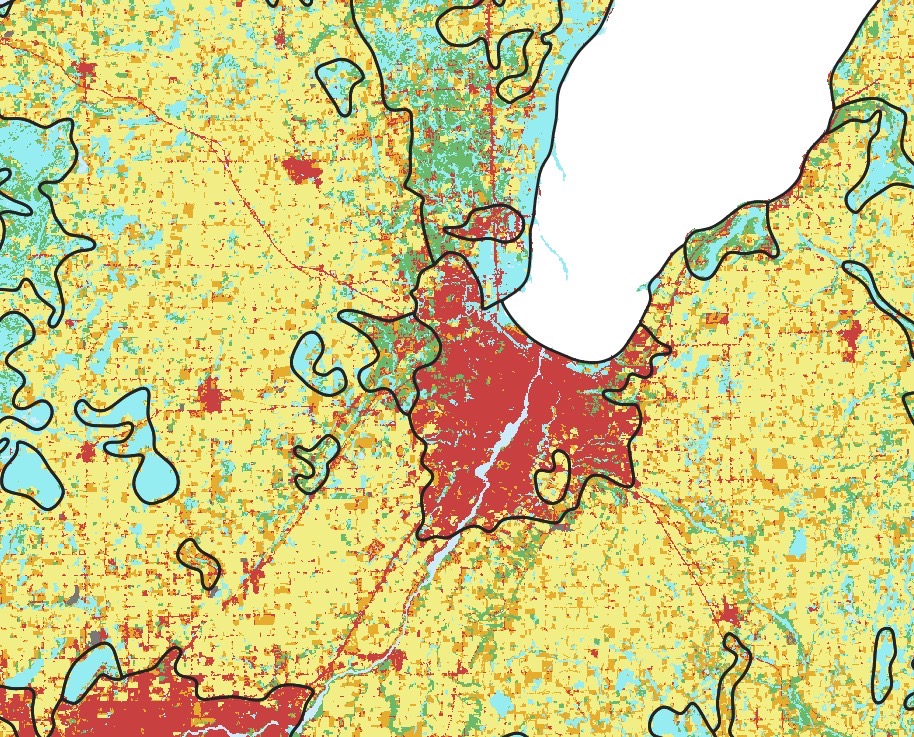
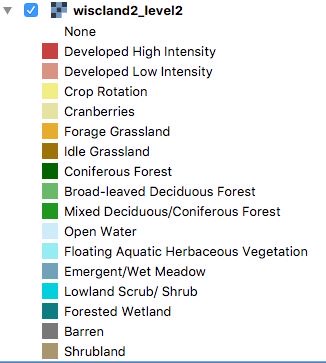
Landcover – Level 2 Detail. Green Bay, this time showing level 2…. even more complex, and even more impossible to turn into a wooden map.
Legend for Level-2. For comparison, this is what the level 2 classes look like. There are two more levels below (above?) this one in detail. So much so that you basically can’t map levels 3 and 4 in any meaningful way.
Composing the Map. Next problem: what should the map look like now that I have a vector file that can be sent to a laser?
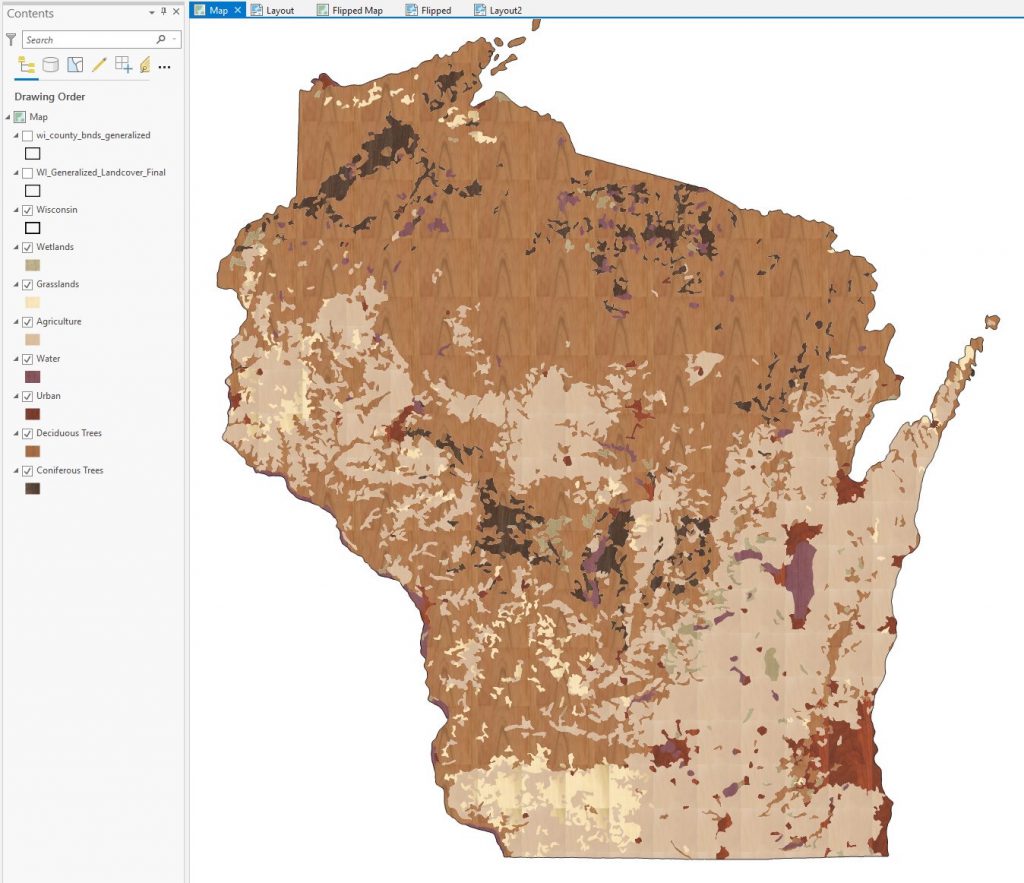
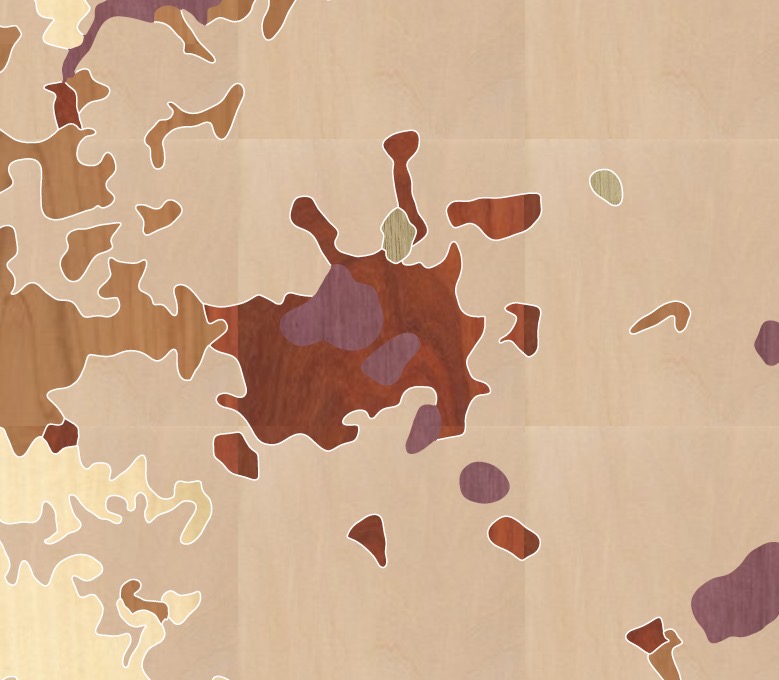
Map Composition. This is approximately what the final product will look like. Final map will be 1:500,000 scale, which will make it around 44″ tall. I used photo fills to make the mockup…borrowed from a website that had really useful closeups of different types of wood. (thanks to Ocooch Hardwoods of Wisconsin)
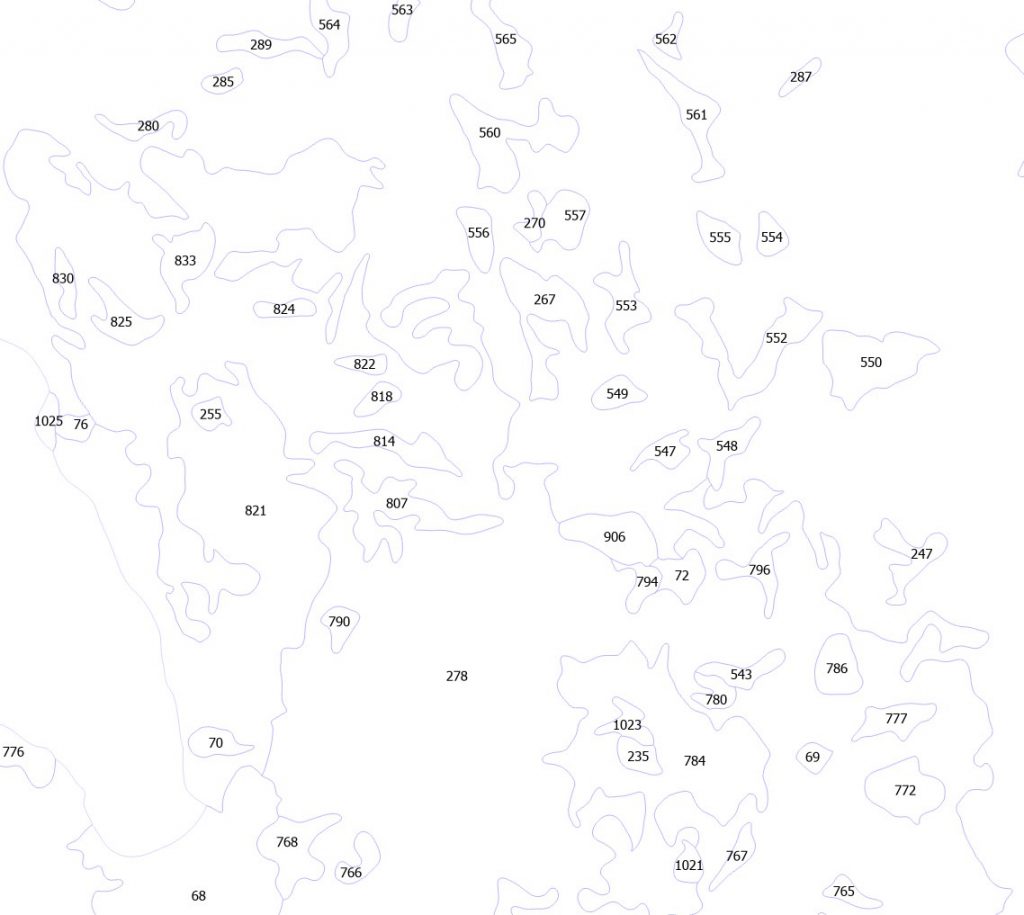
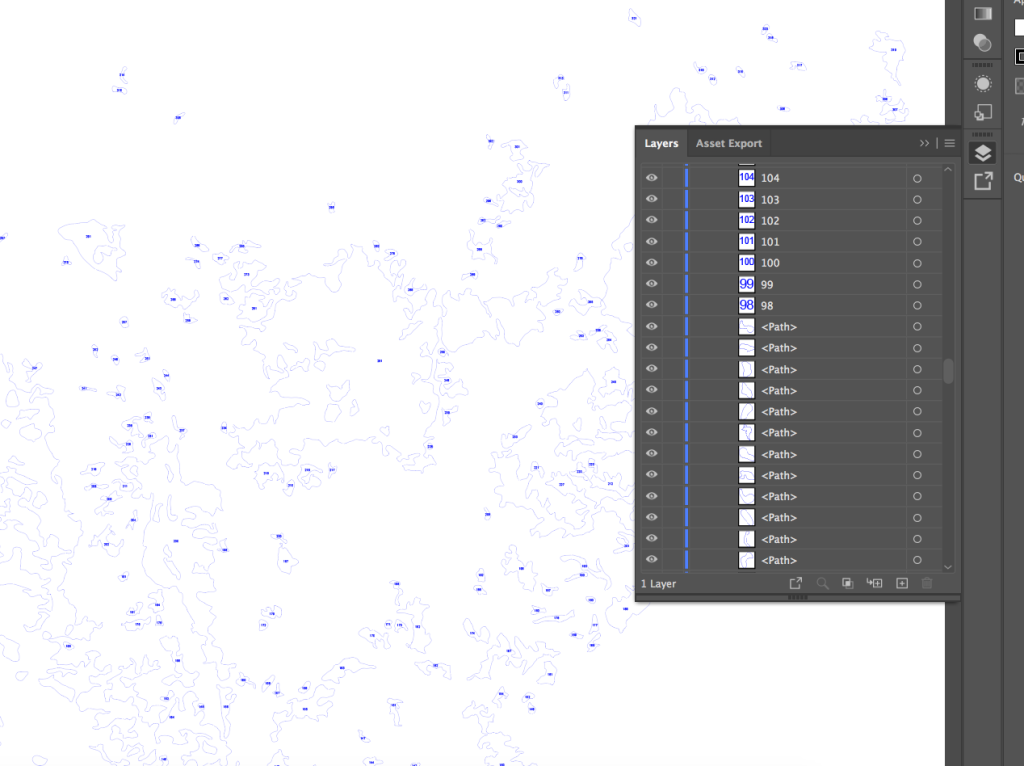
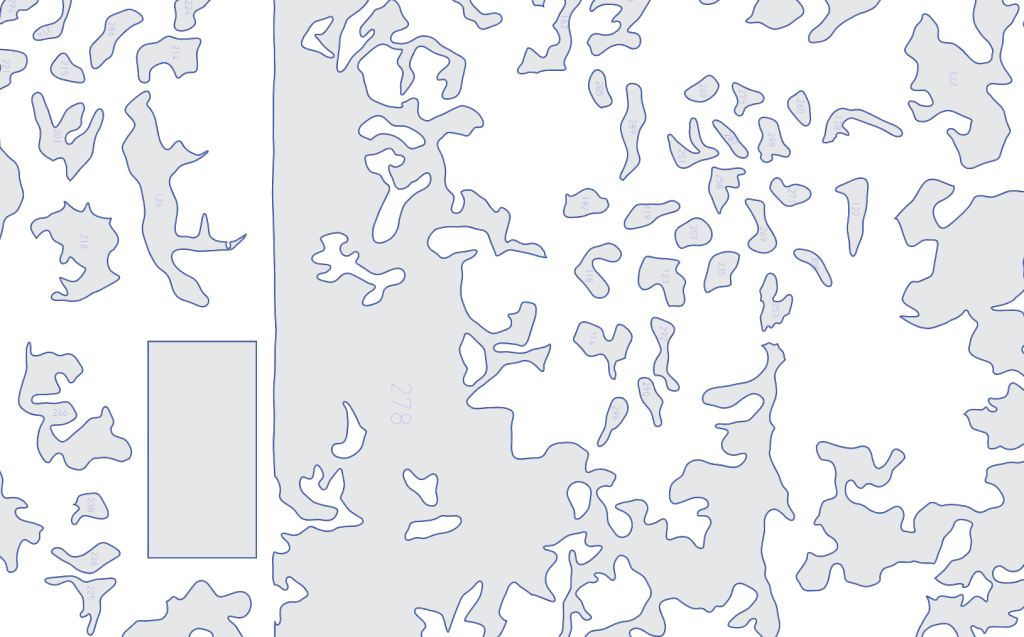
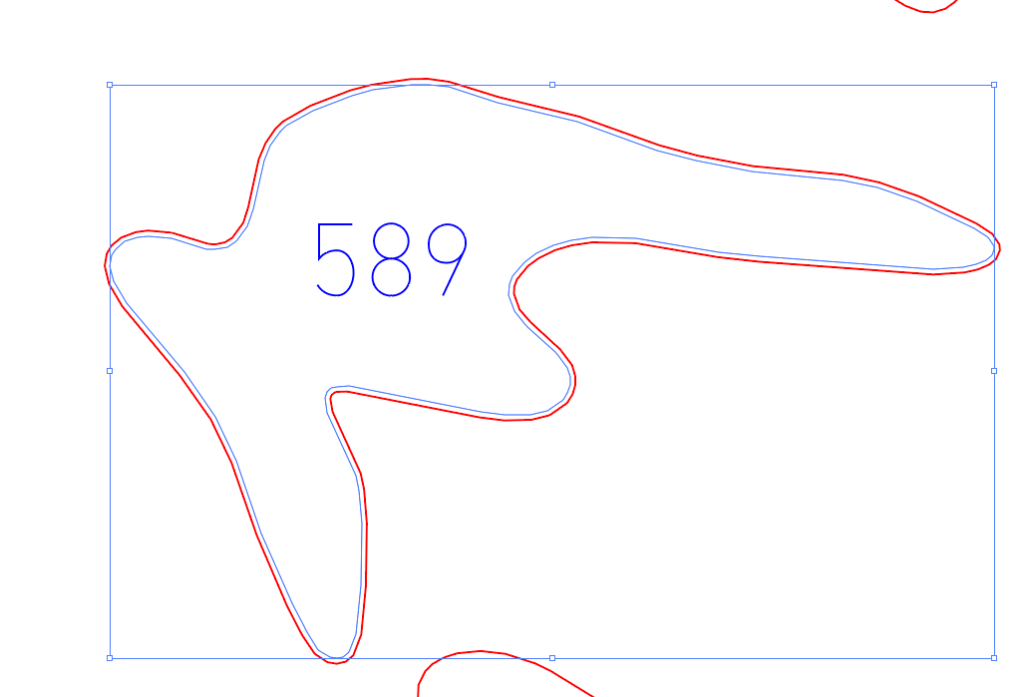
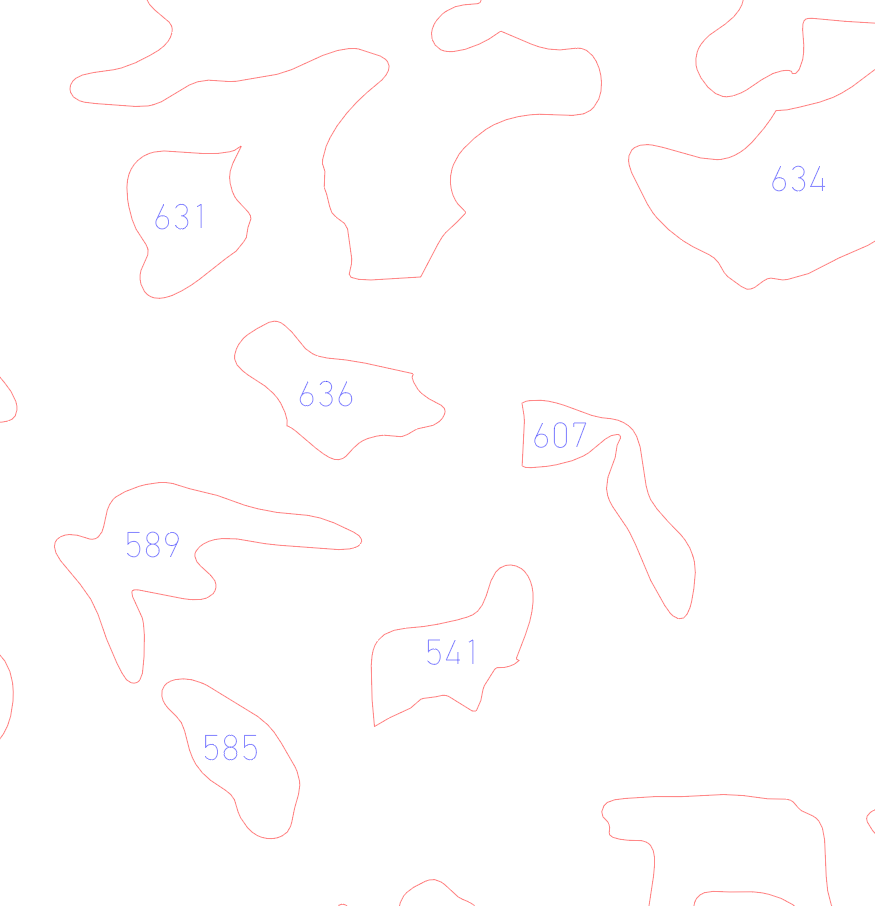
Managing the Puzzle Pieces. How the heck will I know where they fit into the puzzle? The scheme I worked up was to flip the map, and create a map composition with an ID number printed inside each polygon. I could look at each piece, reference an index map, flip it over, and put it into place.

Managing the Puzzle Pieces. Close up of ID numbers that will be printed on each piece.
Managing the Puzzle Pieces. The max cut size for the laser is 24″ x 36″. My map is around 38″ x 44″ inches. Even if my full map fit within that space, I would be wasting a ton of wood if I just glued up huge pieces and started cutting.
… so I knew that further editing would be necessary. I really haven’t done much work bringing GIS-created vectors into illustrator. Believe it or not, I found opening PDFs right in illustrator worked fantastic. All of the vectors and labels came through just fine.
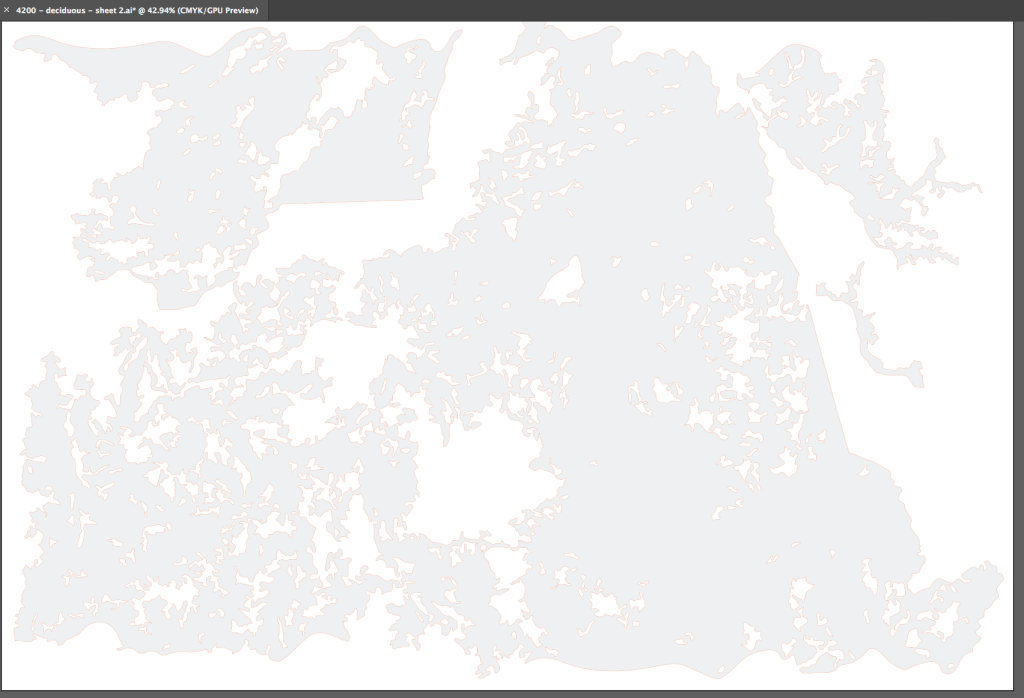
Fun with Nesting. I learned there is something in the engraving and laser cutting industry called “nesting.” I put a fair bit of research into this issue, and in the end only had one real choice: starting moving around hundreds of pieces manually to make them fit on the wood I had.
This was labor intensive to say the least, but relaxing in a sick sort of way. Lots of time moving pieces, moving them again, and making everything fit just so. The deciduous class was challenging, because there was no way to fit everything on one 24 x 36 sheet. So I had to get creative in slicing things up.
Mind the Kerf. Even though it’s a laser, it still blasts away material while cutting. If I just blasted a cut right down the center of each vector line in my illustrator files, none of the pieces would fit… they would be just a hair too small. To address this, every polygon had to be expanded by half the kerf, or 0.1mm.
Prepping for Cutting. Time to cut? Still no. The laser processing software, which operates like a standard print driver, expects very specific colors in the file. Pure red means cut, pure blue means vector engrave, back means raster engrave.
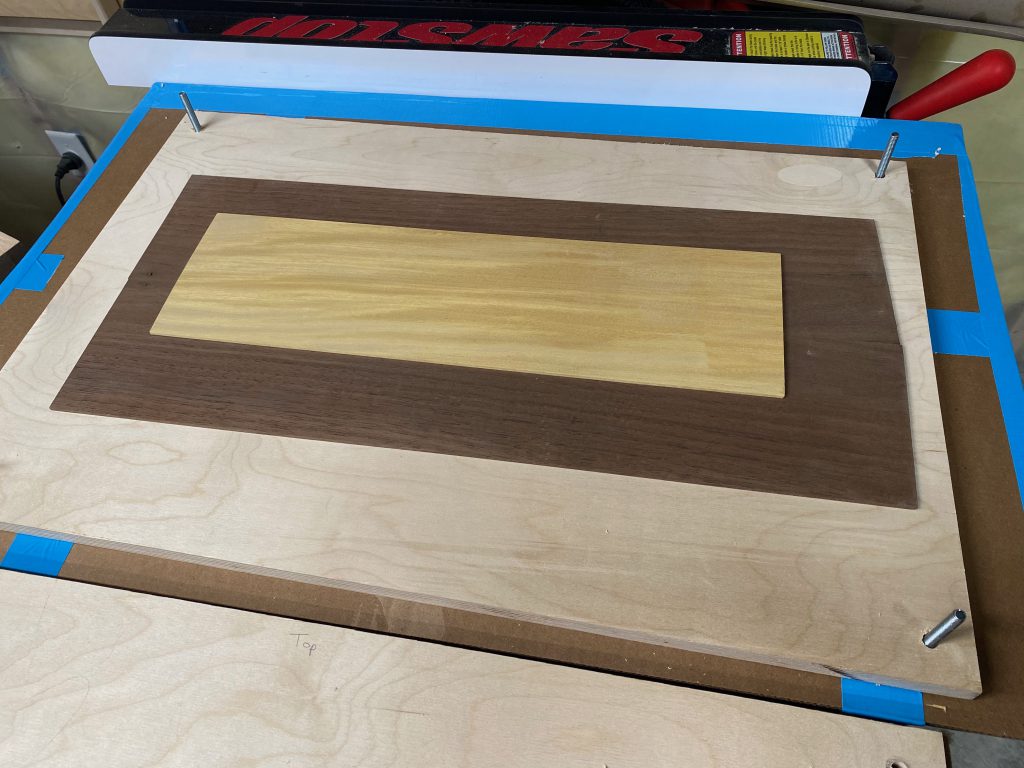
Wood Choices. Some of the thin pieces of wood I needed were ordered from Ocooch Hardwoods located in Viola, Wisconsin. But most of it was resawn from thicker boards of maple, cherry, poplar, and walnut.
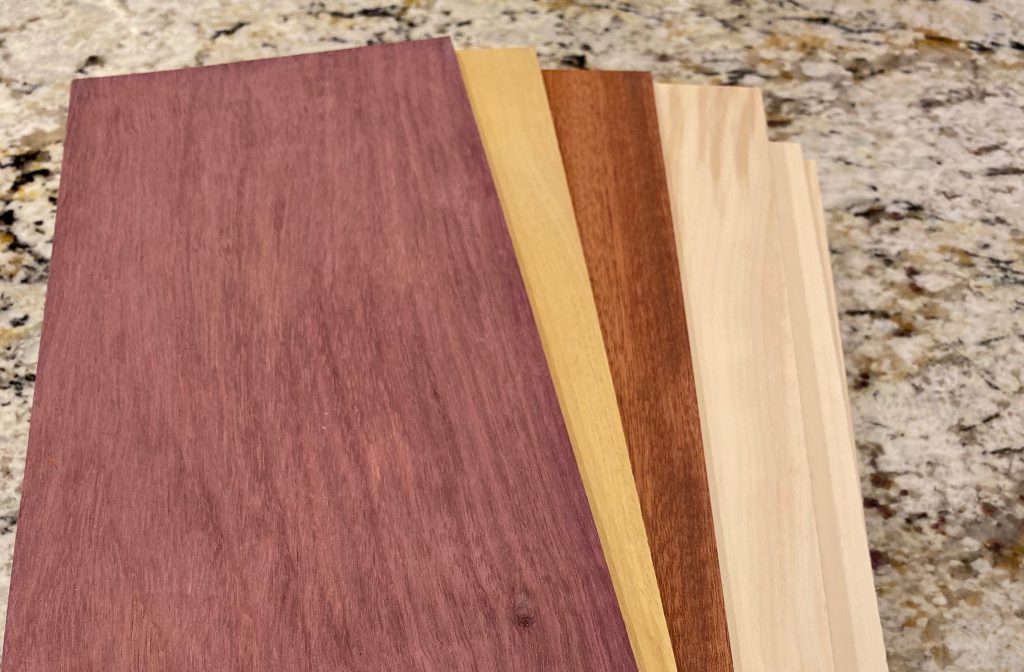
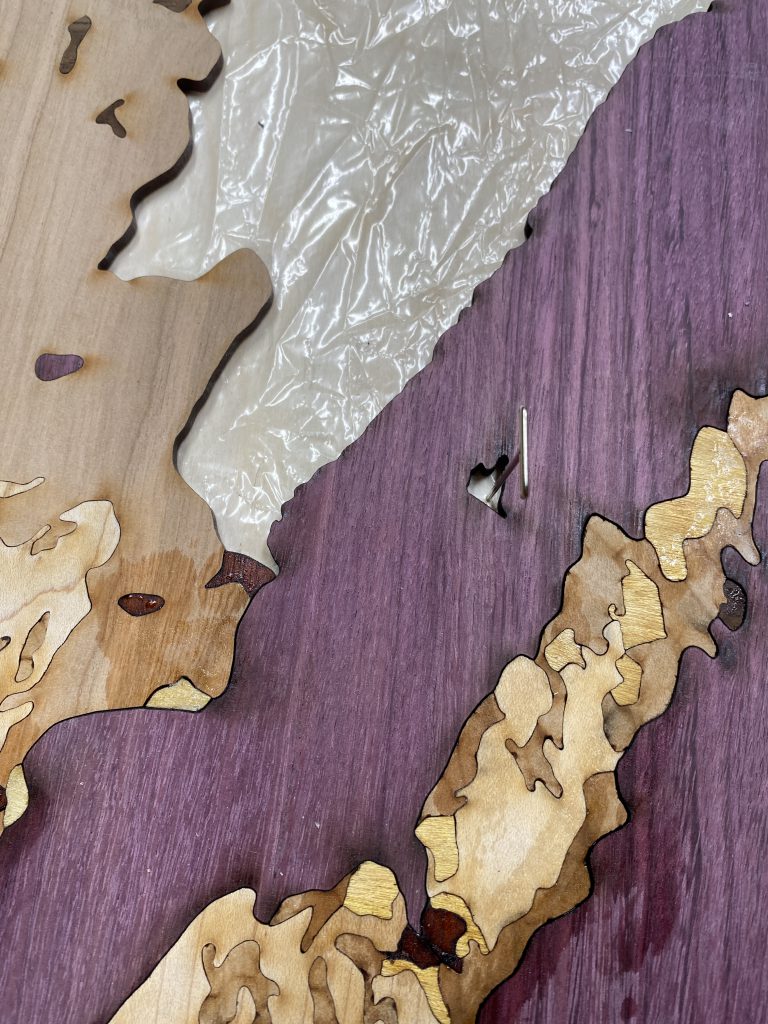
In the following picture: Aspen, upper left, is nearly white in color. That will be “paper” color for areas outside the state. Yellowheart is for grasslands, purpleheart for water, bloodwood for urban, maple for ag, cherry for deciduous trees, Peruvian walnut for coniferous trees.
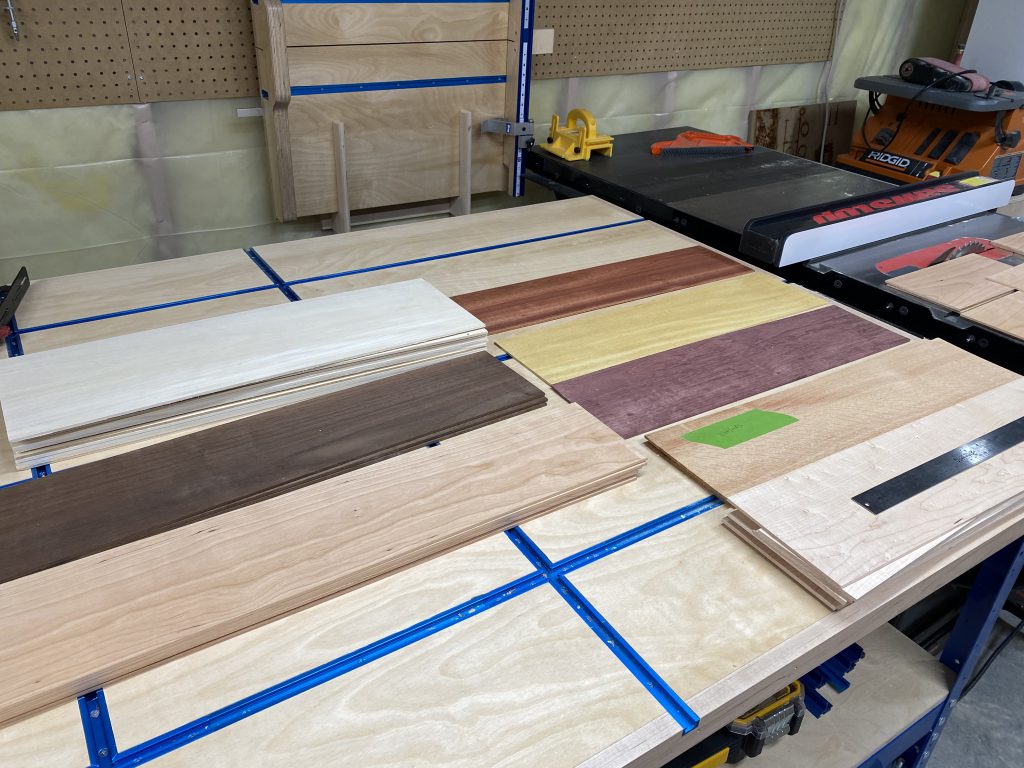
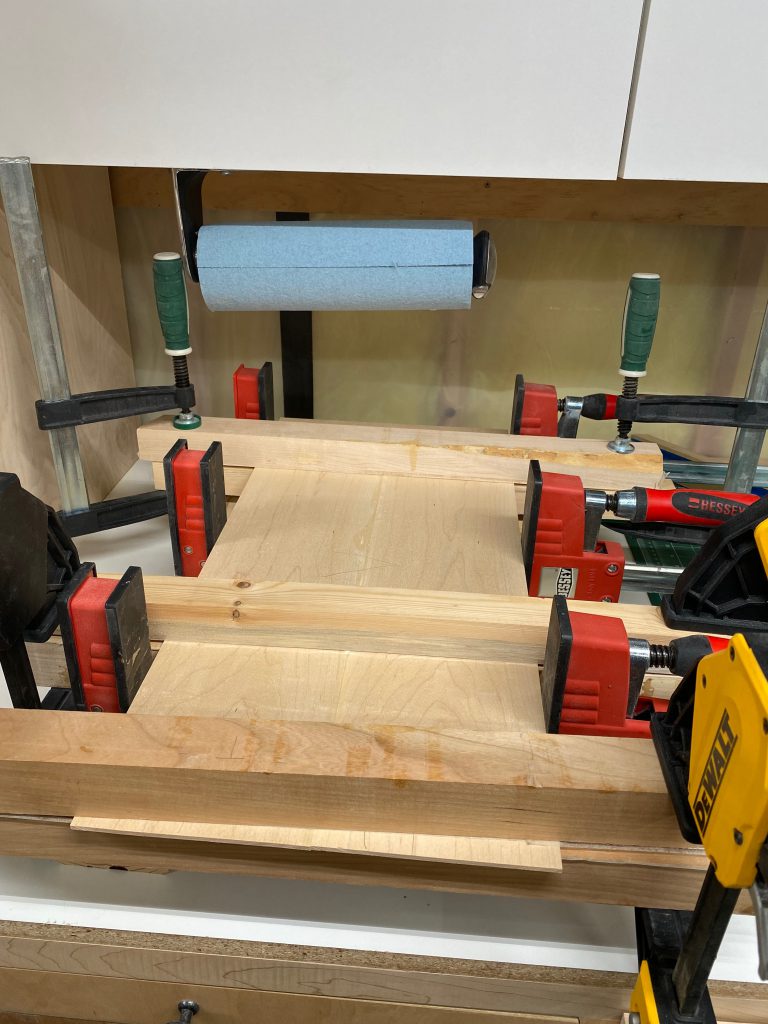
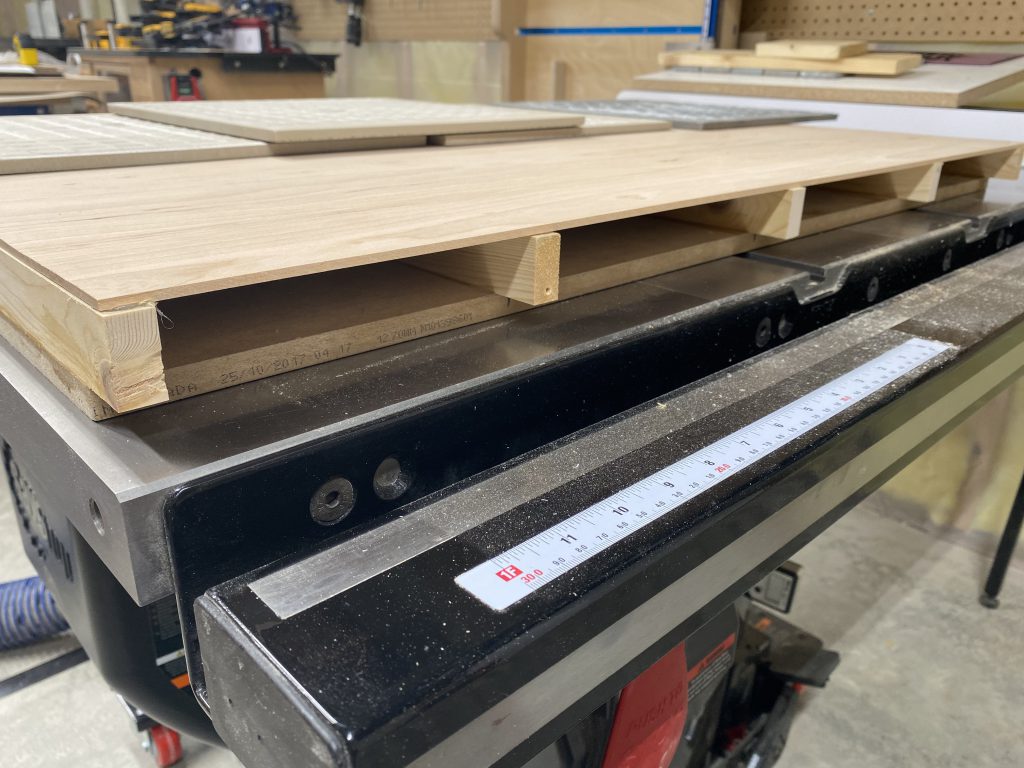
Gluing Sheets. Glue up of thin (1/8”) wood to make larger pieces prior to laser cutting. One major challenge was keeping these thins pieces flat while they were sitting around in storage. I had to keep everything weighted down. Because they are so thin, they liked to warp. This would create problems later during the cutting process.
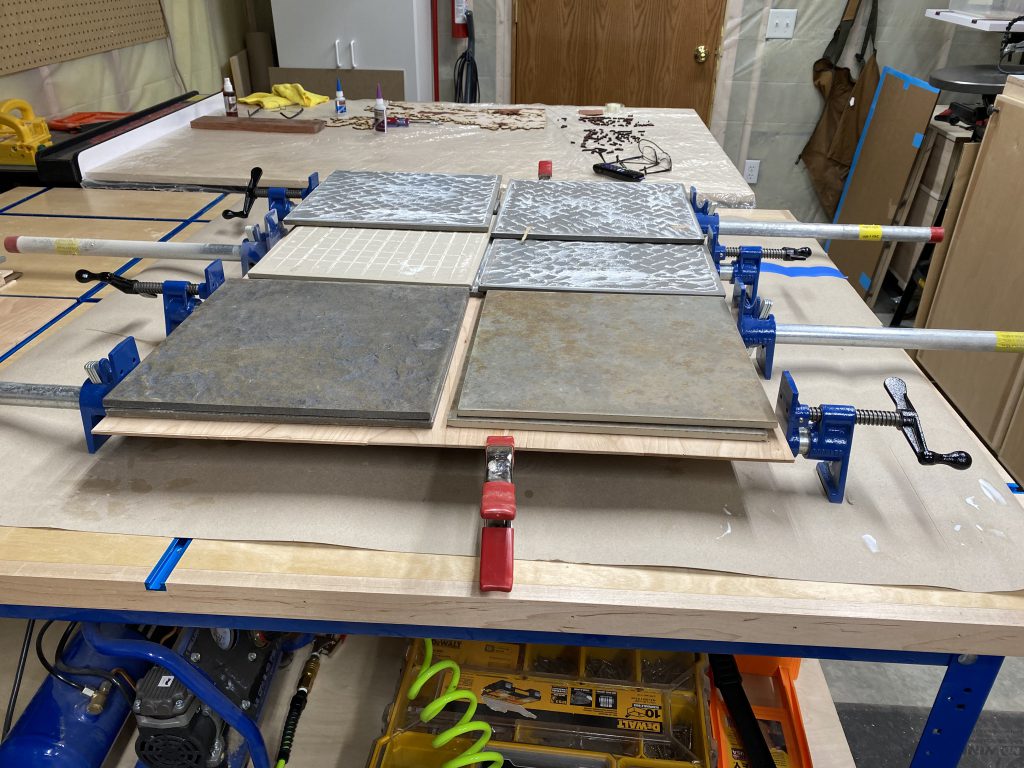
Glueing up the largest map piece yet. 24×36”… max size the laser will take. Good thing I saved all those floor tiles.
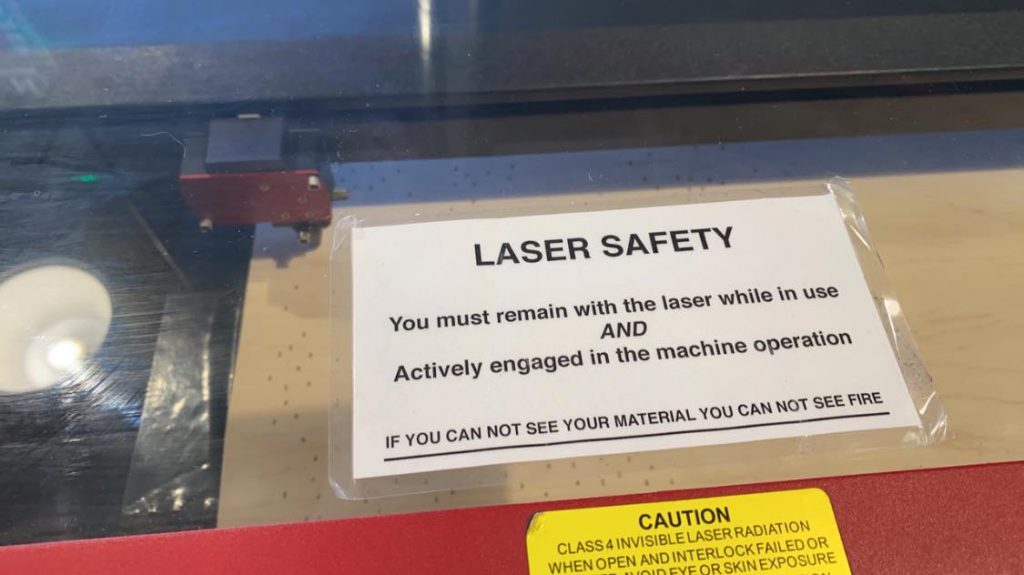
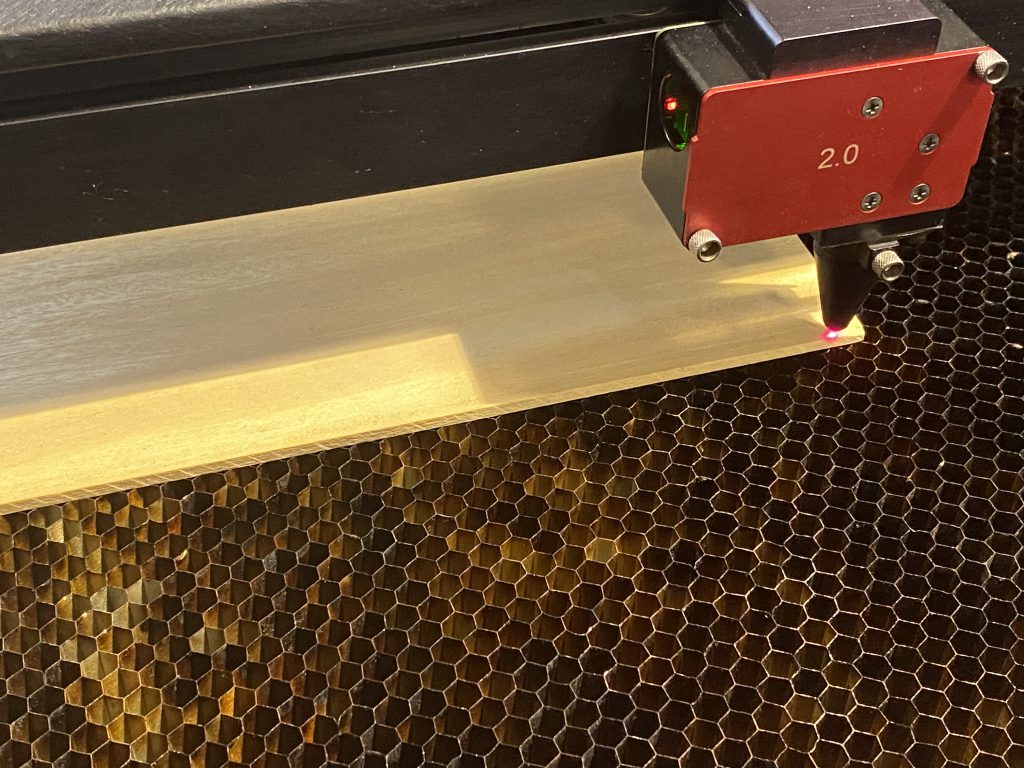
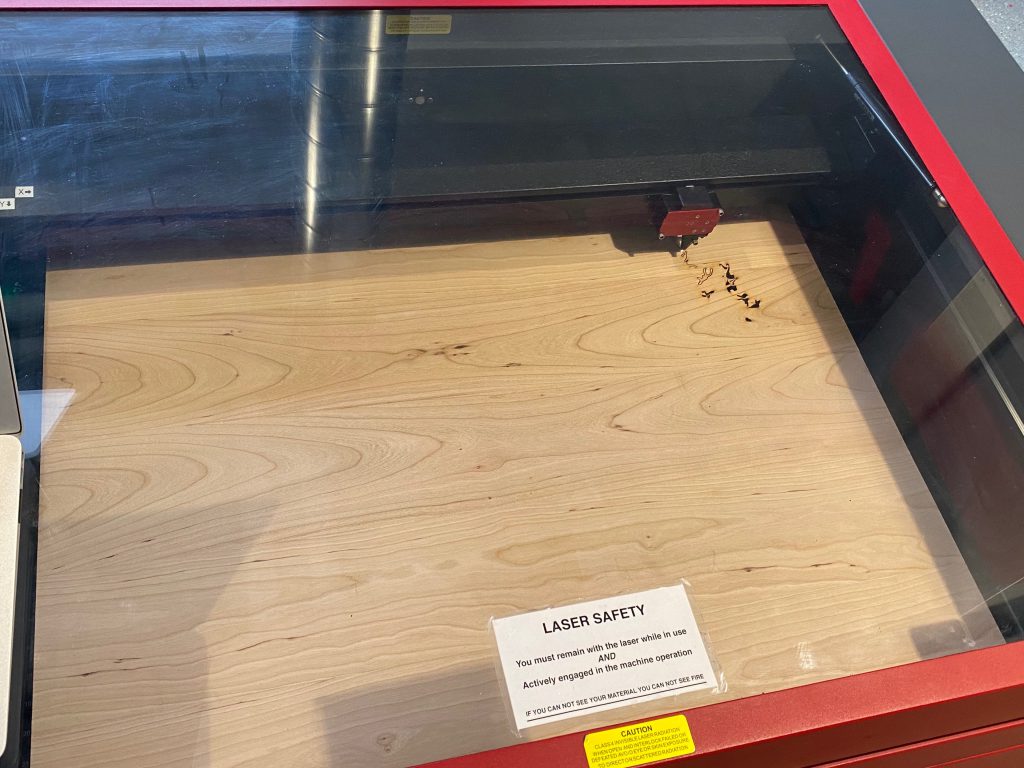
Starting to Cut – Safety First Kids. You aren’t supposed to walk away from the laser while it’s in use. The laser does cause flare-ups at times. Keep in mind the makerspace is primarily used by 18-22 year-olds.
Measure Twice, Cut Once. Getting the piece lined up perfectly is critical. Some of my layouts utilize darn near every square inch of available space. If I miss (e.g., the laser runs past an edge), that means more redos.
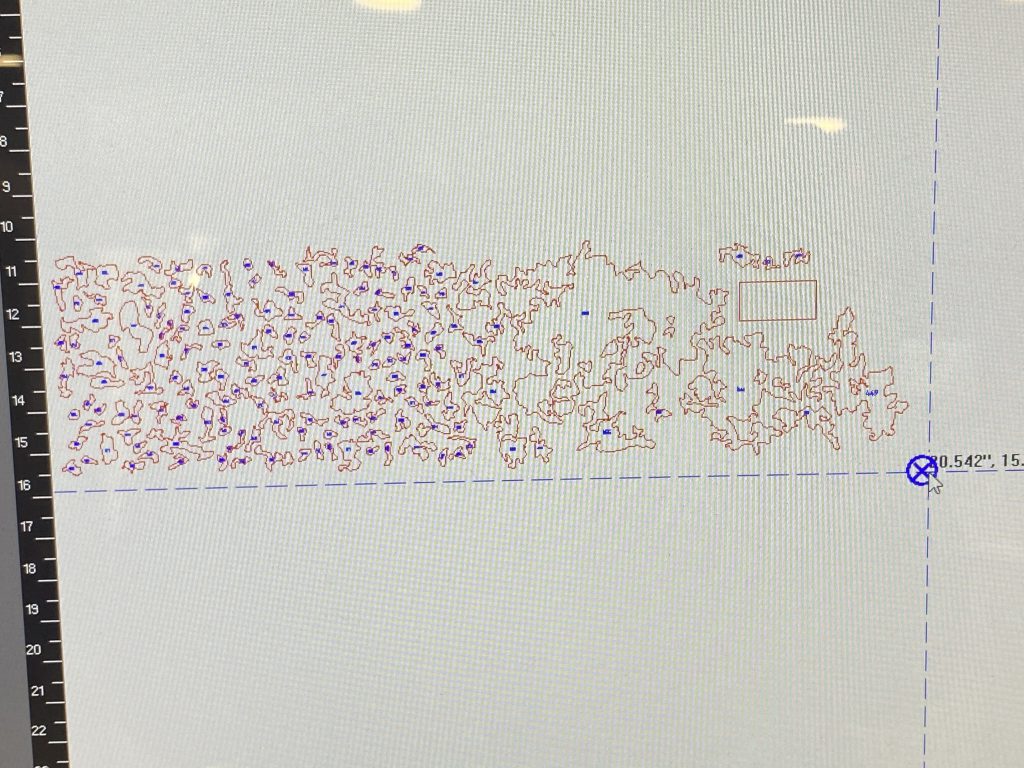
Laser software has a positioning cursor to make sure things are lined up properly.
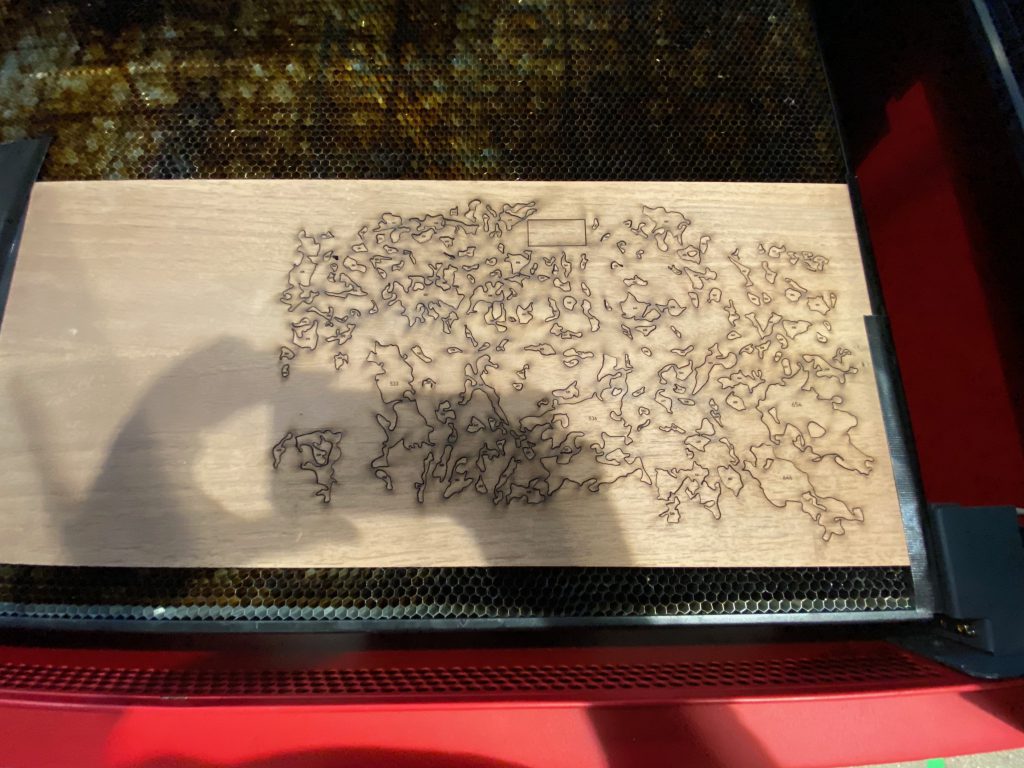
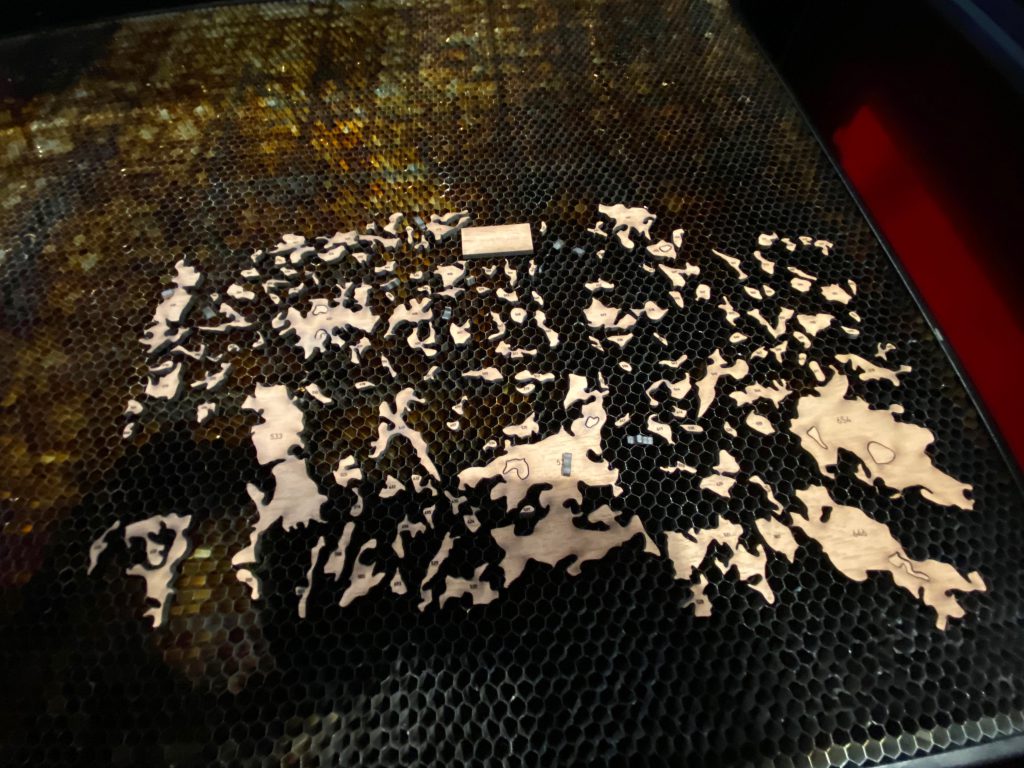
Fresh off the Laser. After removing the negative cut piece, lots of tiny pieces are left. And to answer your question: yes I do lose a lot of pieces below the aluminum honeycomb cutting surface. Pieces tend to get stuck in there too.
Piece extractinators. Go with what works.

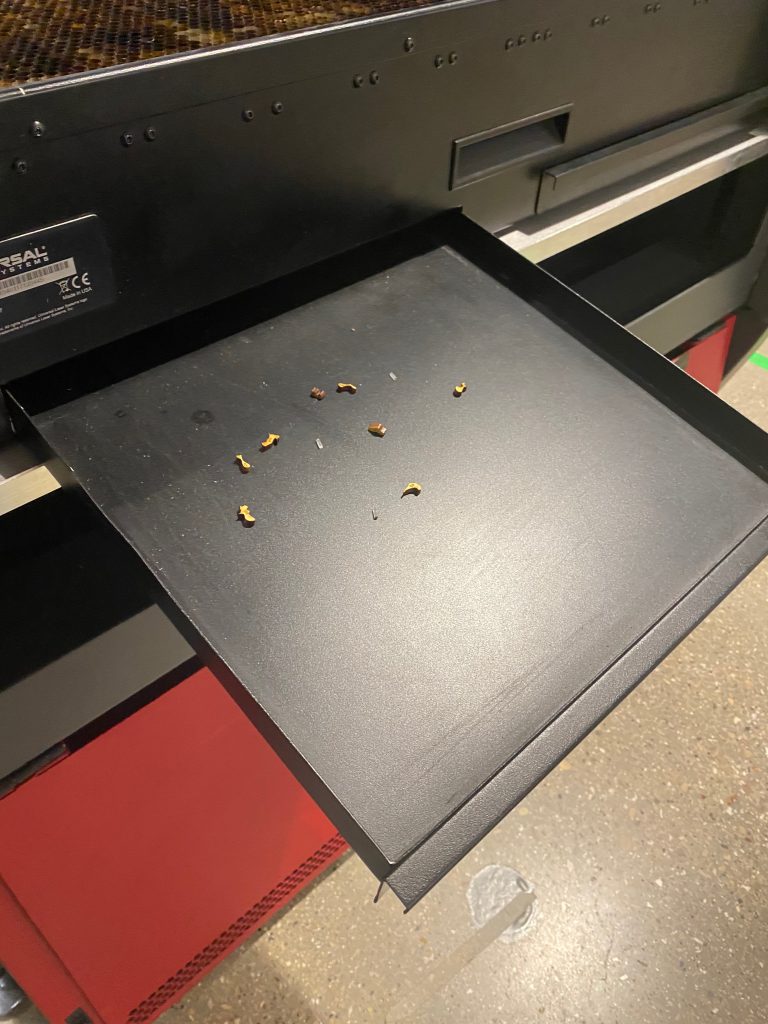
Catching Pieces. There is also a tray that catches small pieces. I check the trays after every session, but I’m certainly going to lose pieces along the way. My plan is to assemble everything, then make a list of pieces that went missing.
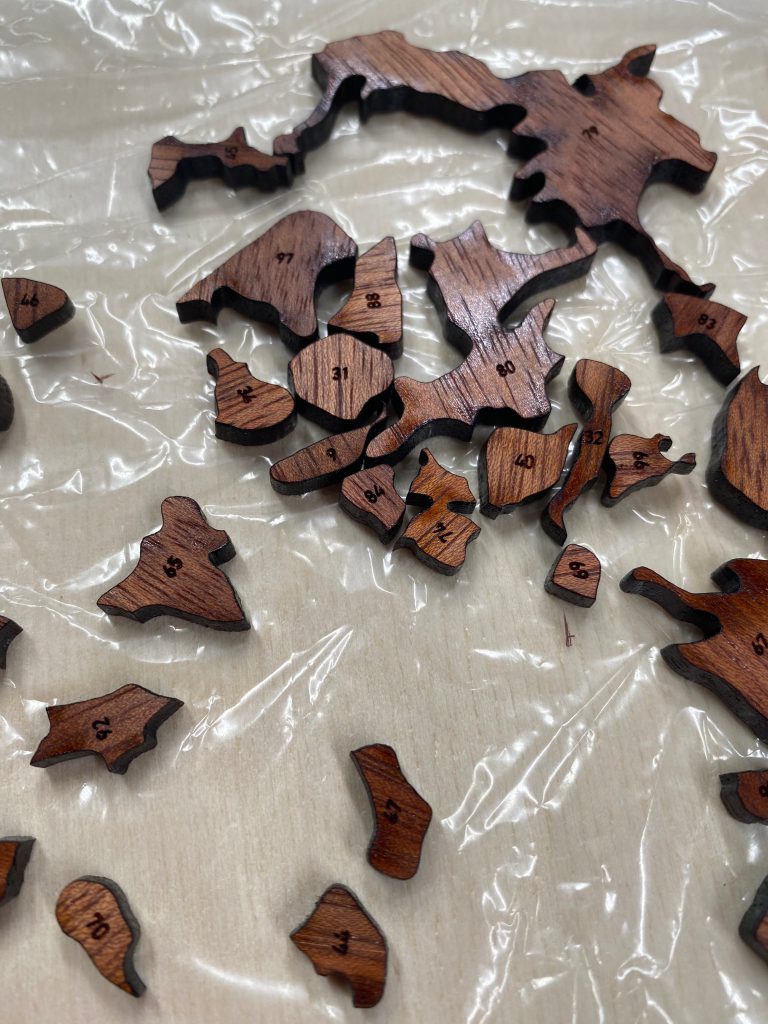
Don’t Forget Your Glasses. Each piece is numbered so I know where it goes. Text on most pieces is about 5 point, so reading glasses are a must for my aging eyes.
Mock-Up for Madison Area. Compare this mockup to next pic.
Actual Pieces for Madison Area. Madison up close. Looks pretty reasonable so far, and will look much better later on after some sanding.
Mistakes Happen… Frequently. When I was doing my manual “nesting” in illustrator, I was often too focused on fitting the puzzle pieces to the size of the material. That means I sometimes didn’t pay close attention to the orientation of the grain due to my various nesting manipulations… which led to some redos.
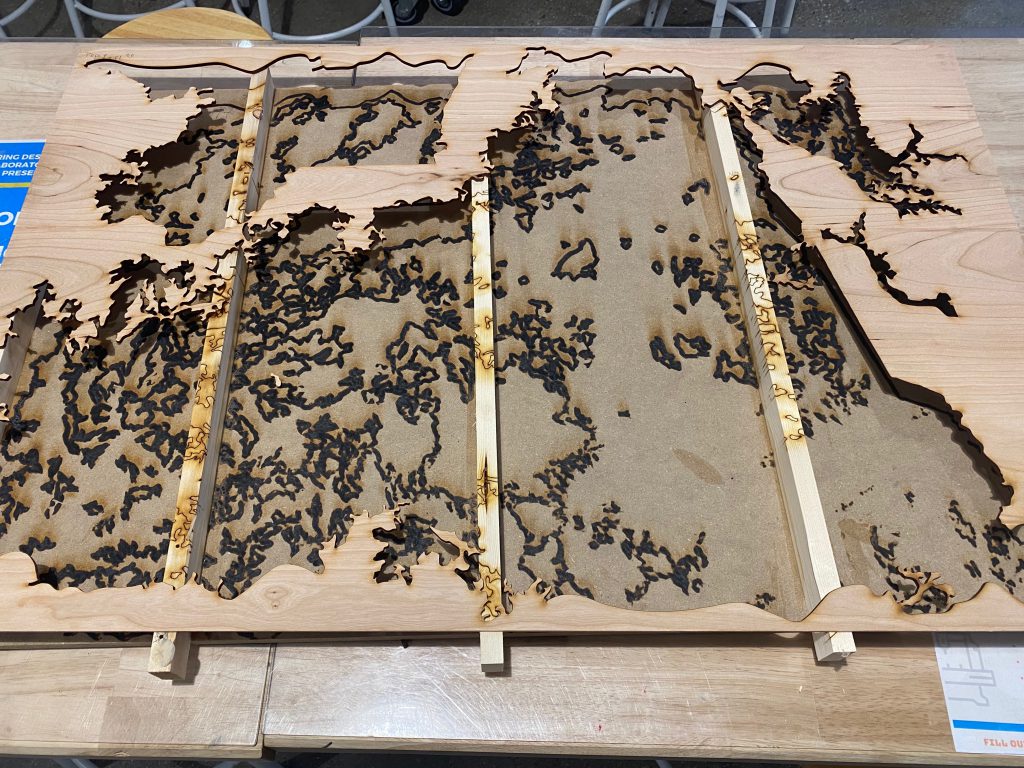
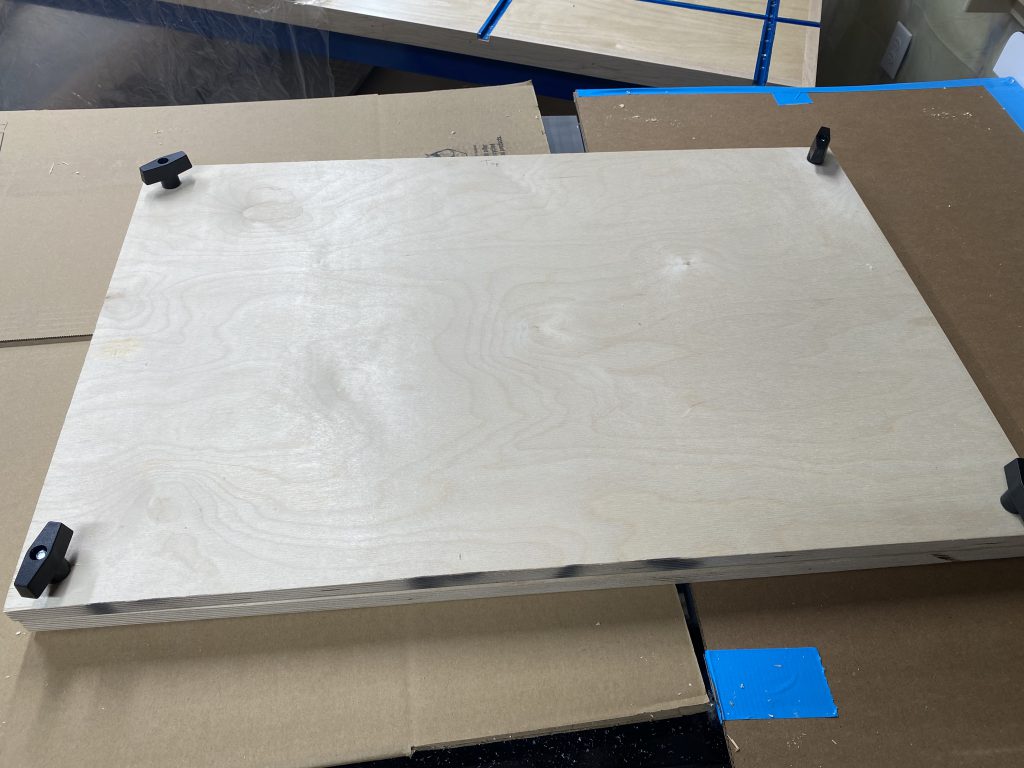
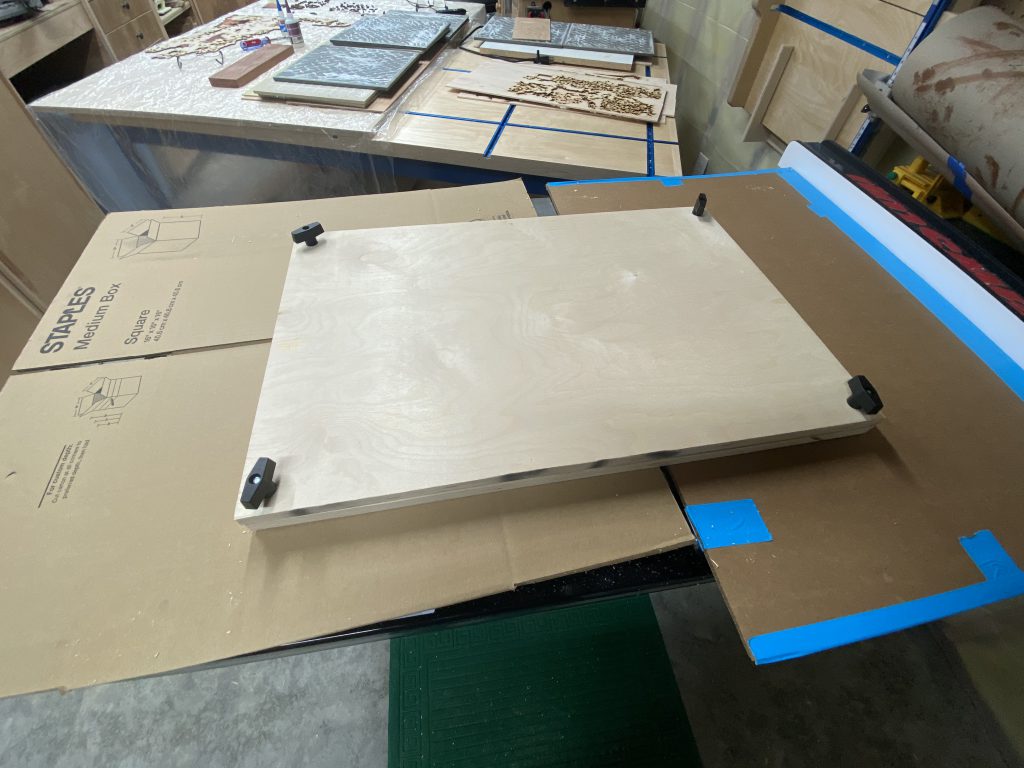
Keep it Flat. The largest piece was 24″x36″. I knew keeping that large of a piece flat while cutting would be a significant concern. So my solution was to glue some supports to a piece of MDF. I then hot-glued the piece to the supports in a few strategic spots that I knew the laser wouldn’t hit.
My jig loaded into the laser, and cutting begins.
The cutting jig fresh off the laser. It worked shockingly well.
The laser off course made a mess of the MDF below, but so what? In the future I will use this setup to cut all pieces. I had issues keeping smaller pieces flat as well. There just isn’t a safe and reliable way to keep things flat on the aluminum honeycomb surface.
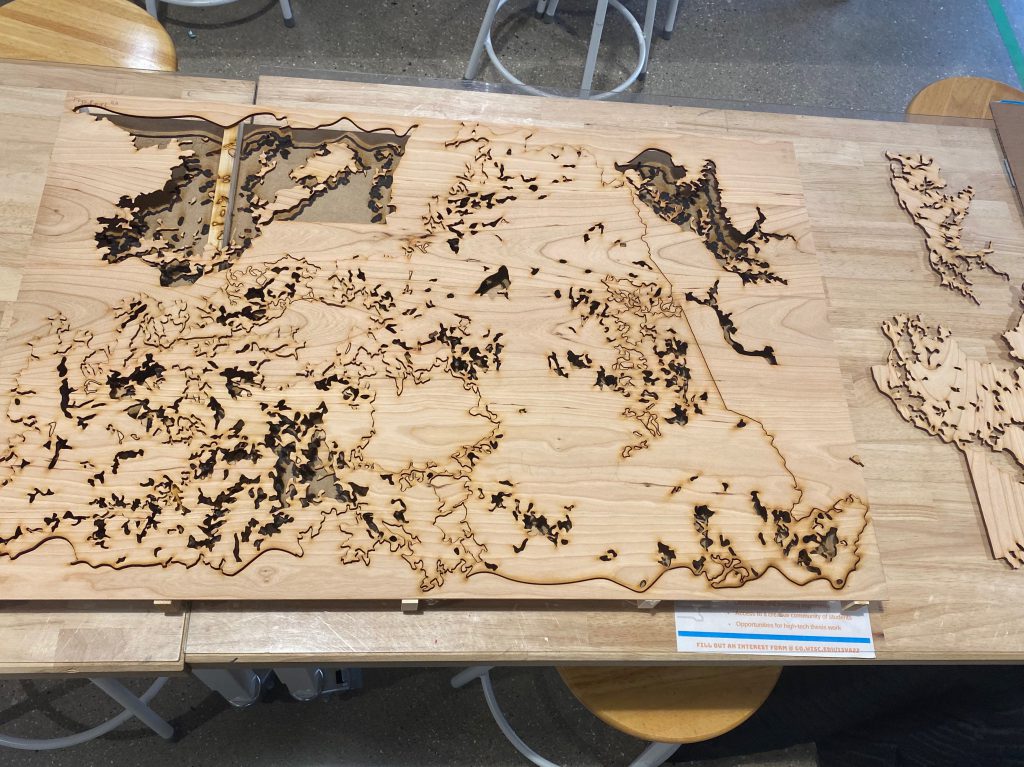
Largest Cut Piece. Fresh off the laser, this is the largest piece by far. This is cherry, which represents deciduous trees.
Sheet Transportation System. My highly-sophisticated wood transport system. Hey kids, don’t mind the old guy carrying sheets of plywood across campus.
Seriously though, keeping 1/8″ sheets of wood flat is a big problem. If the wood warps or bows during cutting, that is bad (laser head hitting the piece could result in damage to the laser.)
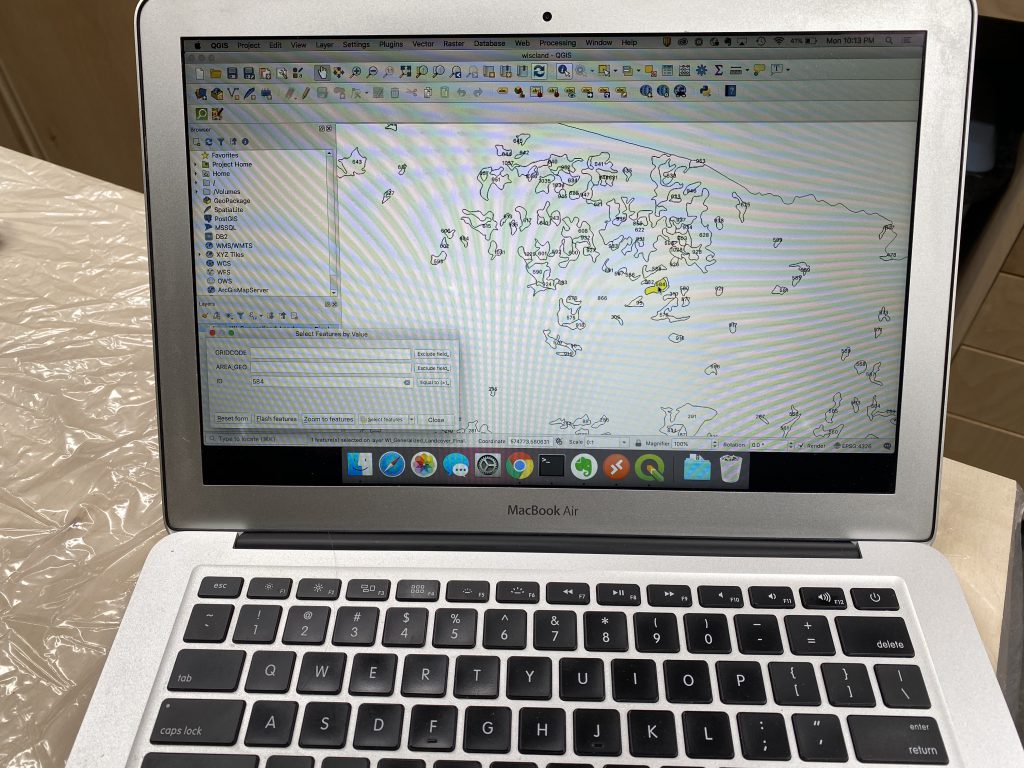
Starting Assembly. My system for assembly was pretty straightforward. I had QGIS open on my laptop, grabbed a piece, looked it up by ID number, and zoomed the QGIS map to the proper location so I could figure out where the puzzle pieces belong. Repeat x 1,100.
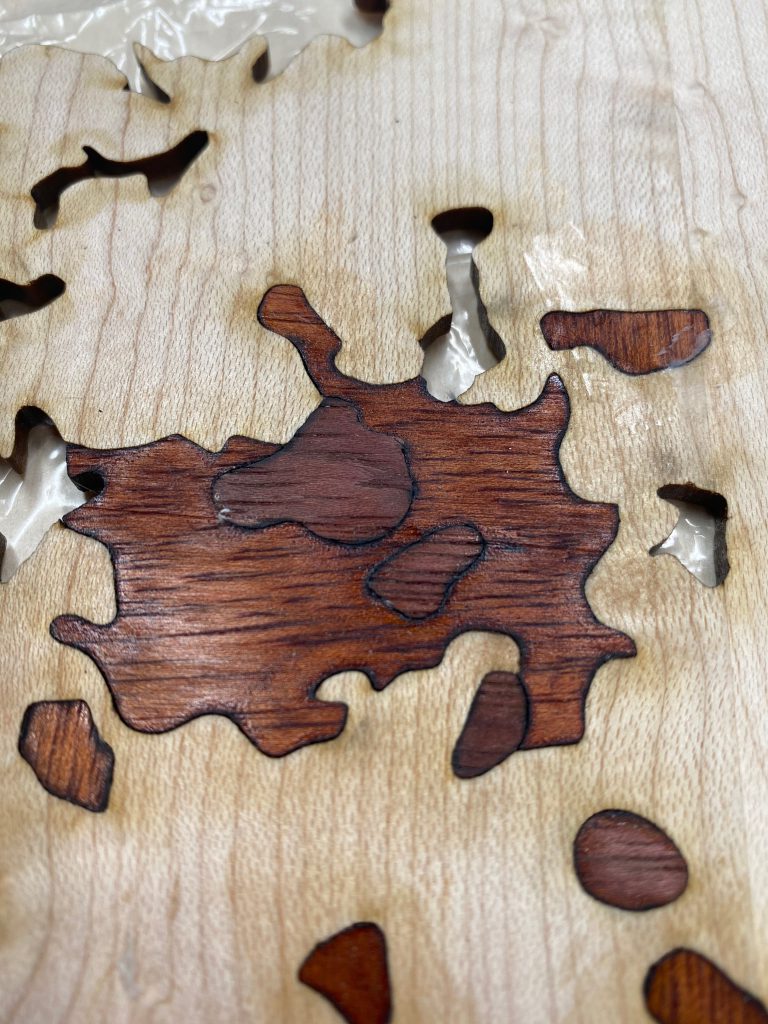
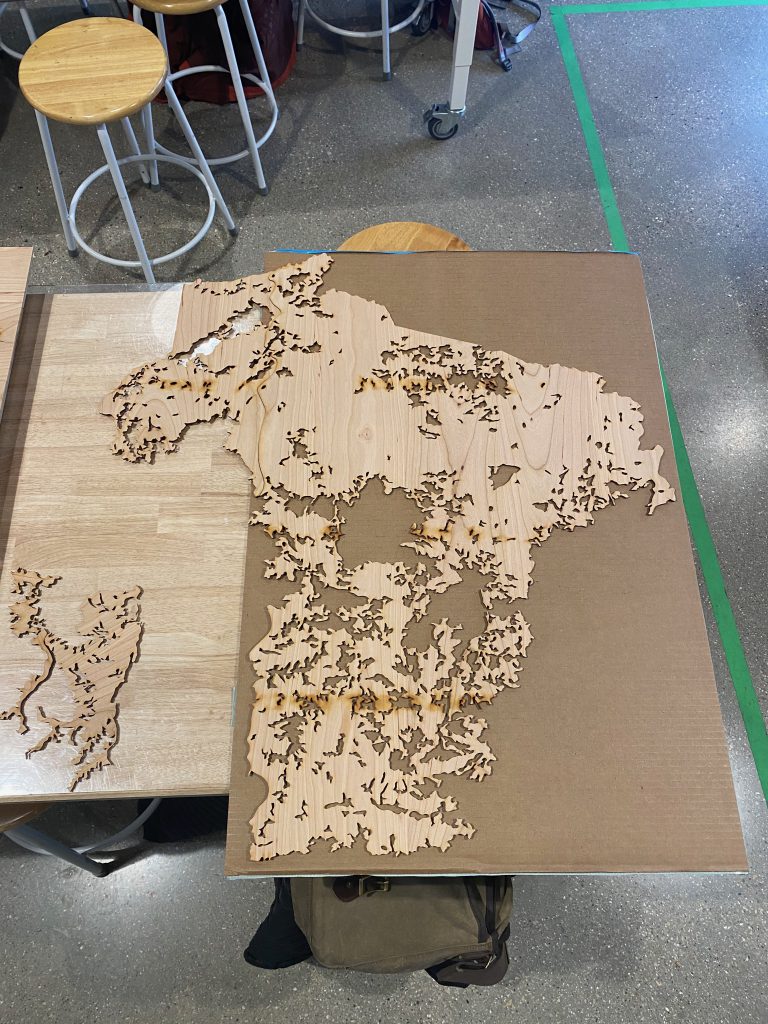
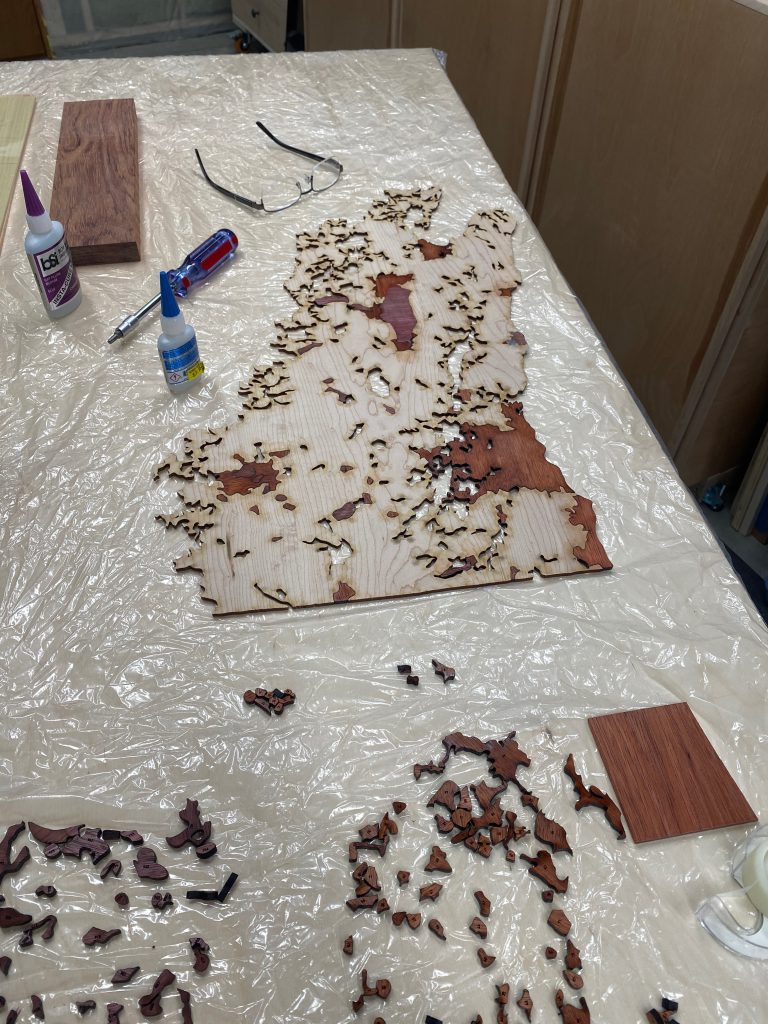
Beginning the Assembly. Jigsaw puzzle or map? Start of assembly, showing southeast Wisconsin. The pieces actually fit together very snugly, but I’ve been experimenting with using tape or CA glue (superglue) to hold things together during assembly.
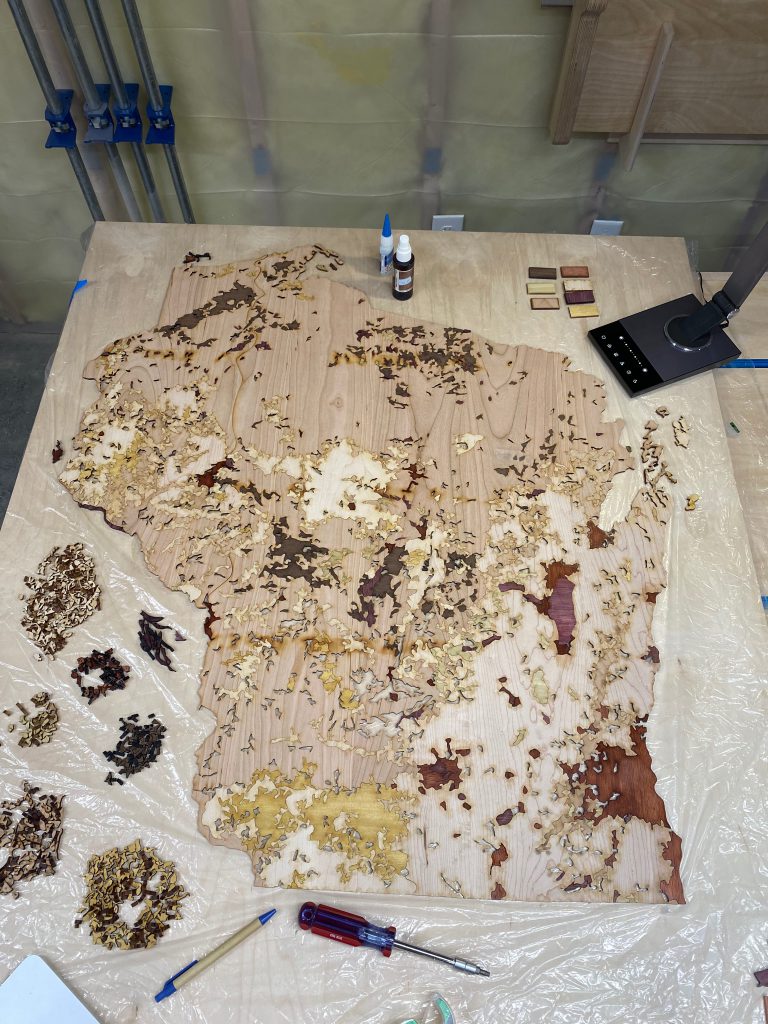
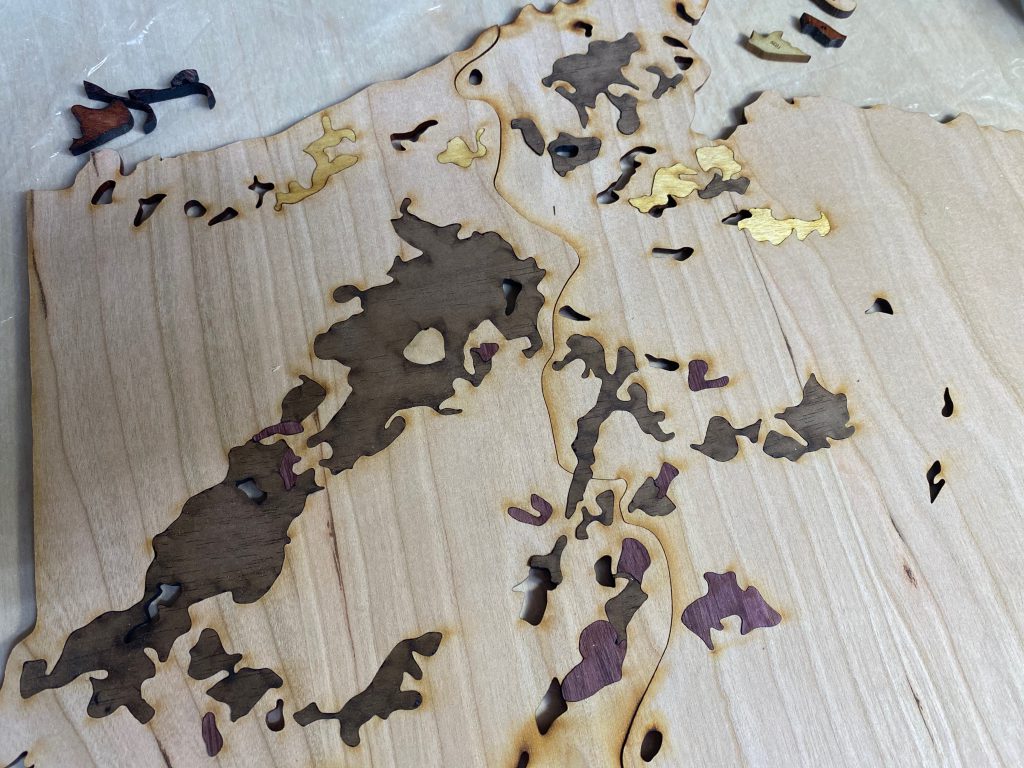
Close Up of Northern Wisconsin. Notice the burn mark that runs across the map. That will sand out just fine later on.
Notice the wavy line running vertically across the map. This is a cutline between two large pieces. With a maximum size of 24″ x 36″, the laser could not handle the large piece needed for the deciduous class. I opted to slice the map into two pieces with an irregular line to avoid a hard break.
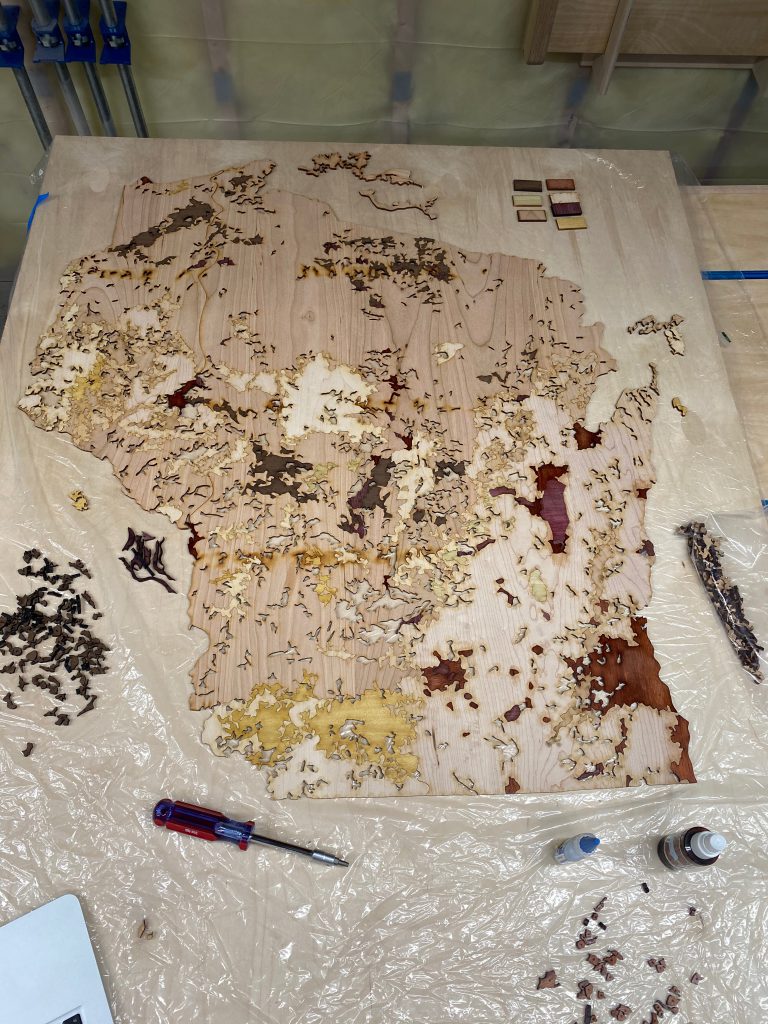
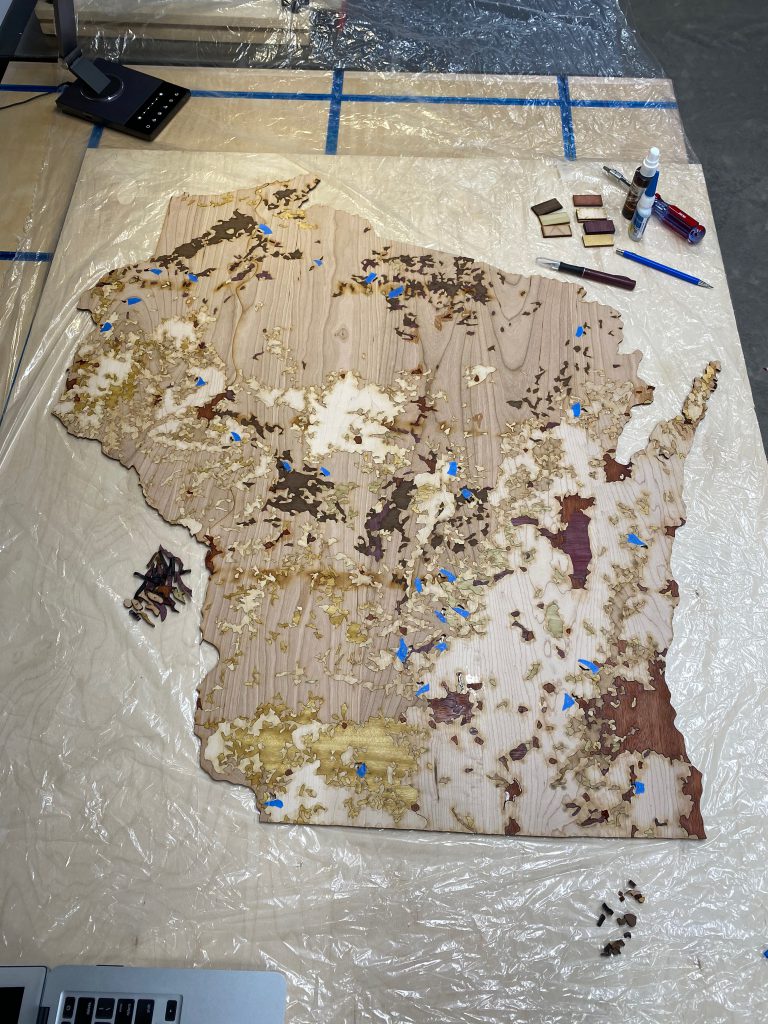
First Phase of Assembly Complete. I didn’t keep track, but I estimate total assembly time was around 10 hours. Not horrible, considering a traditional jigsaw puzzle can easily equal that. Notice the blue tape marking spots throughout the map. In the end, I lost about 30 pieces that needed to be recut.
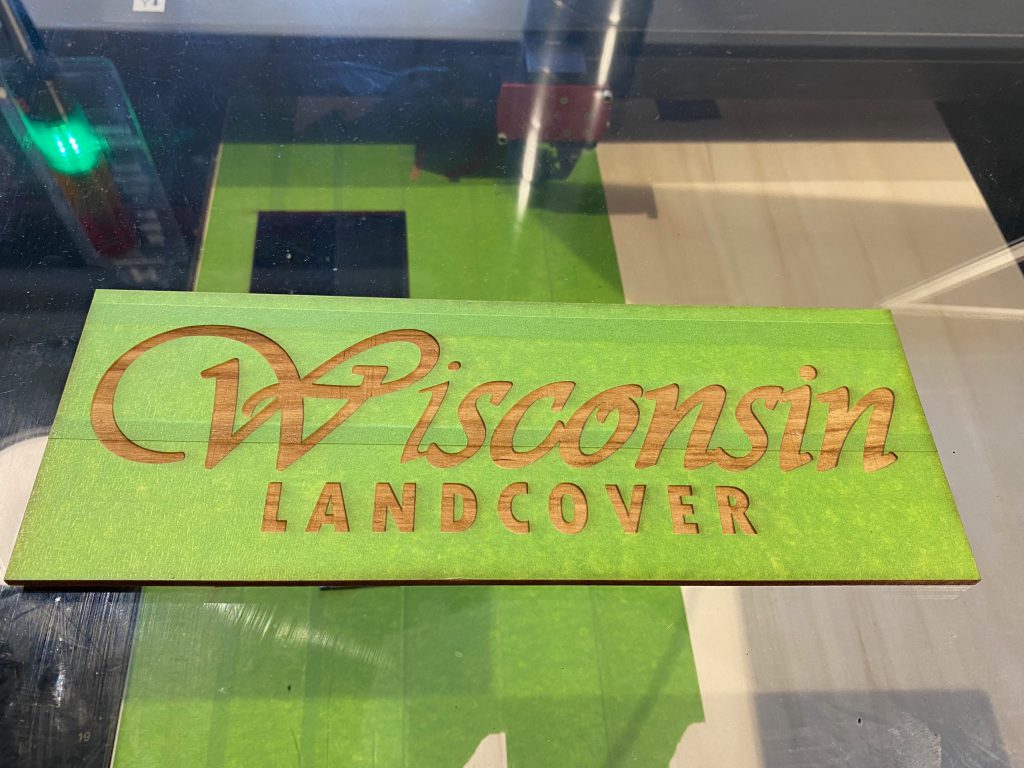
Test of Masking for Lettering. I wanted to test how I would do the lettering on the map. I was going for something unique, not the usual burned lettering associated with laser projects. My idea was to mask off an area with frog tape, laser engrave, paint black, then remove the mask. Unfortunately, the paint readily wicked under the masking tape into the wood.
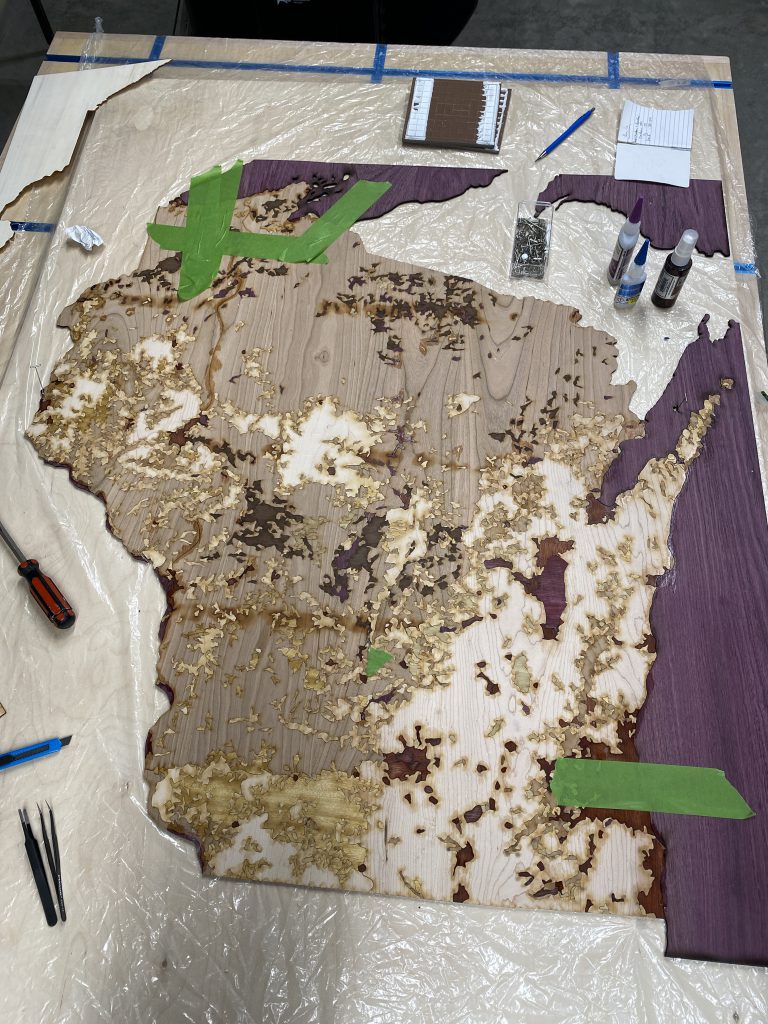
Mind the gap. After yet another hiatus, one of my first tasks was to find all voids, and make a list of pieces to re-cut.
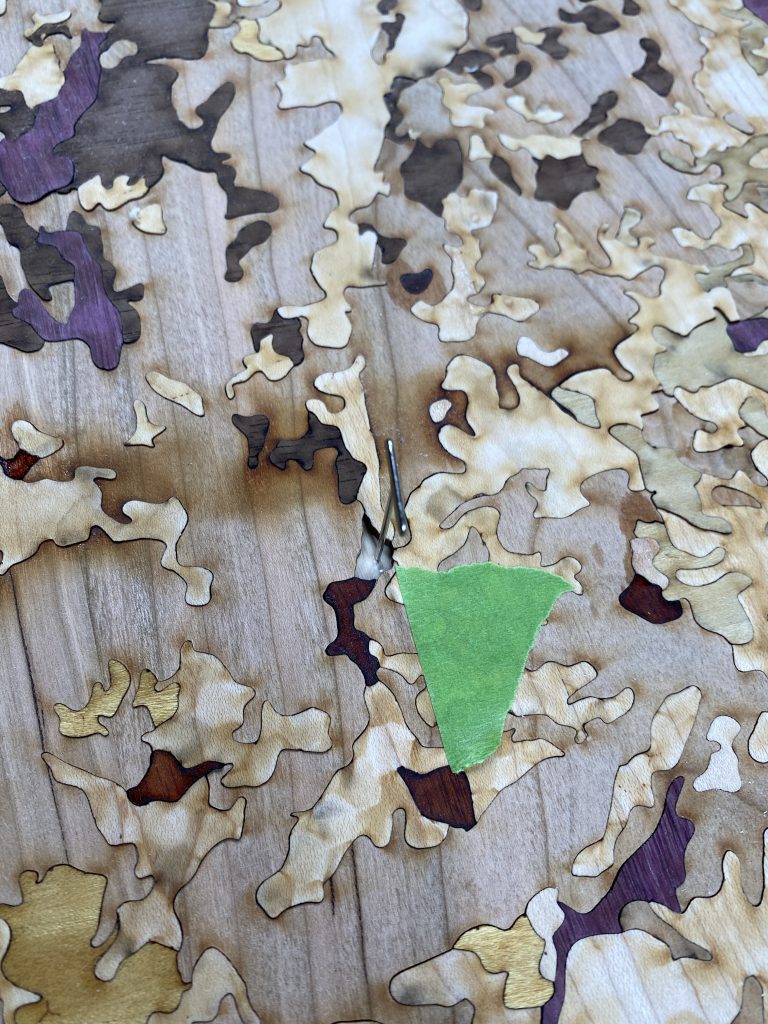
Rethinking the layout. After having nearly a year to mull things, I called an audible and changed my approach… I decided to include lakes Superior and Michigan in the layout.
One thing I can confirm, after taking a year off you have to re-learn a lot on the laser. I had my share of screw ups… like the Apostles not fitting quite right.
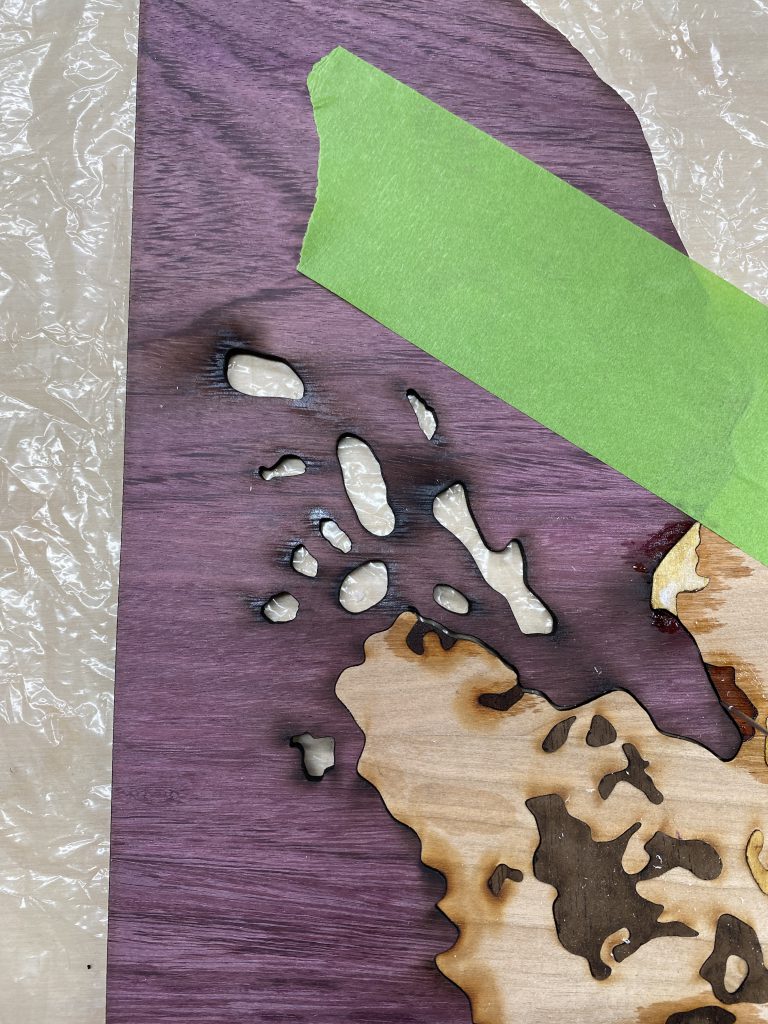
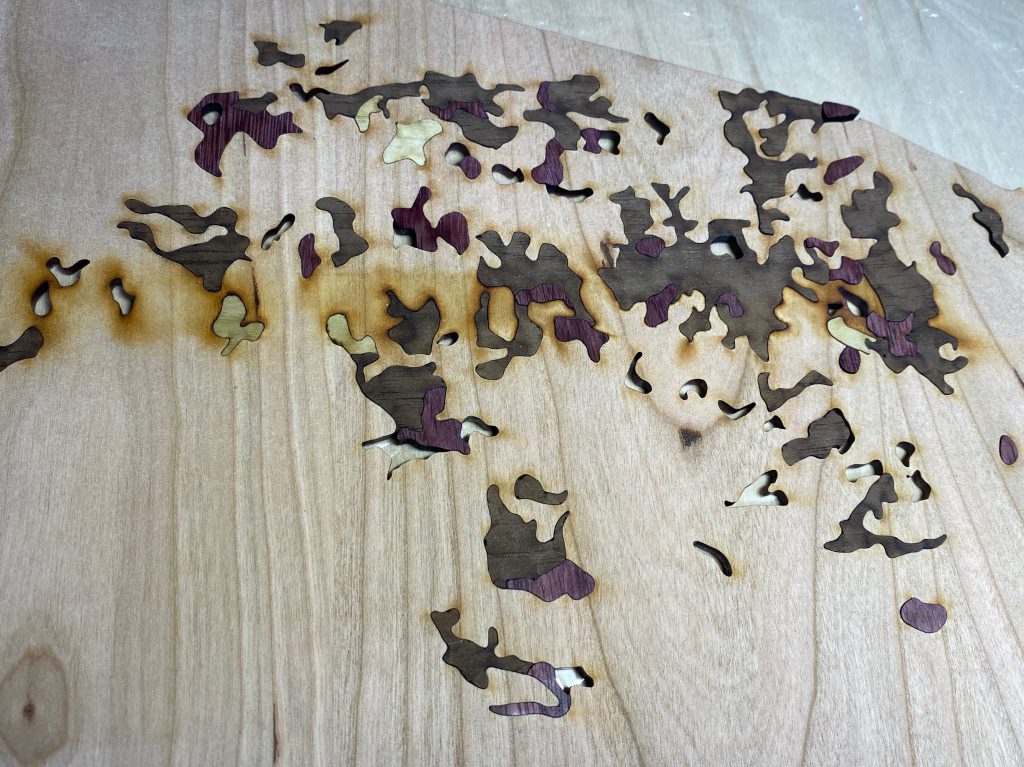
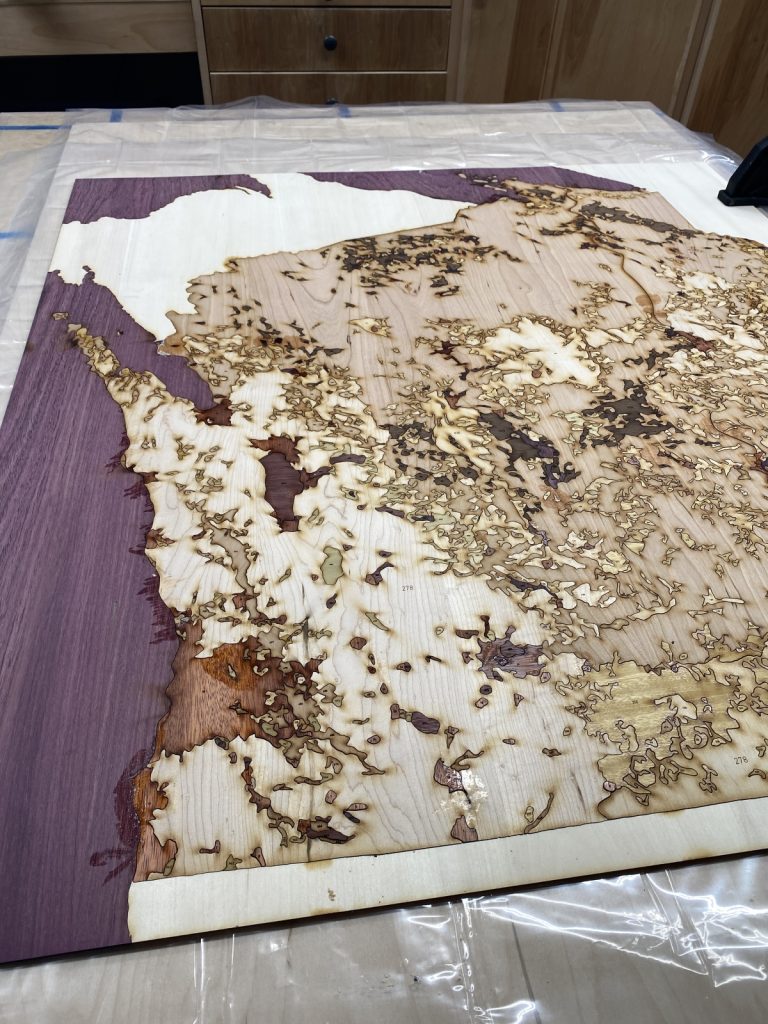
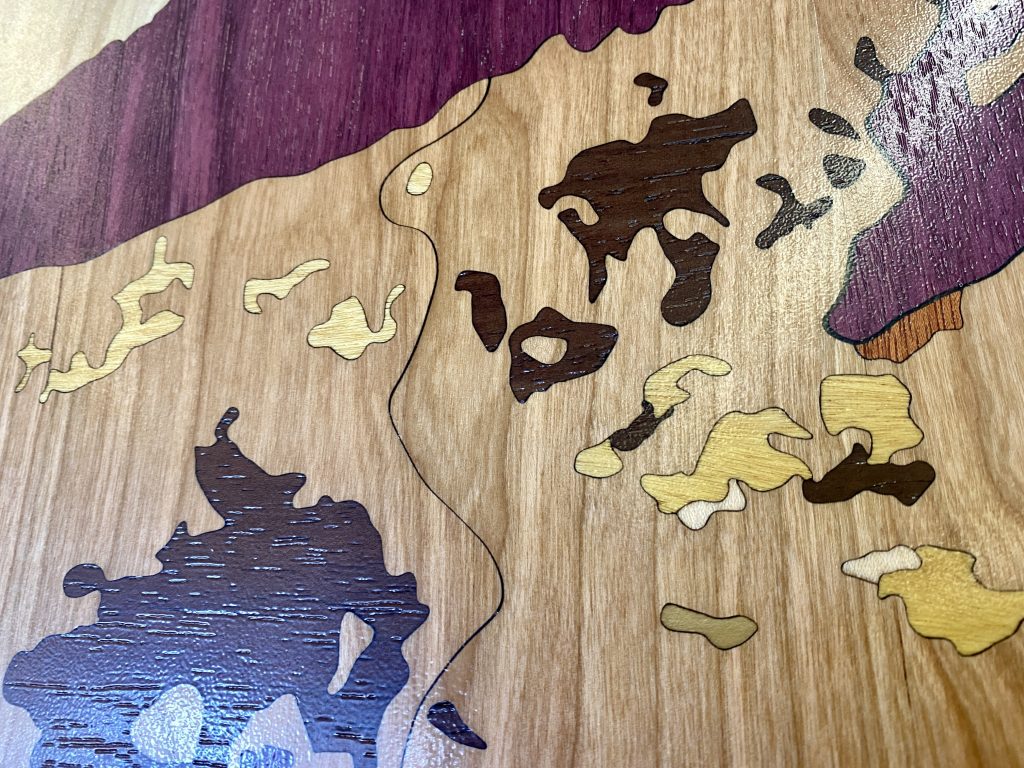
Yes, the water is purple!
How to handle text? Next major problem was revisiting the handling of text. I wanted to fill the letters with a black paint or ink, so that required some experimentation. The approach that worked: seal the wood with Deft sanding sealing, and mask the wood with a transfer tape prior to engraving.
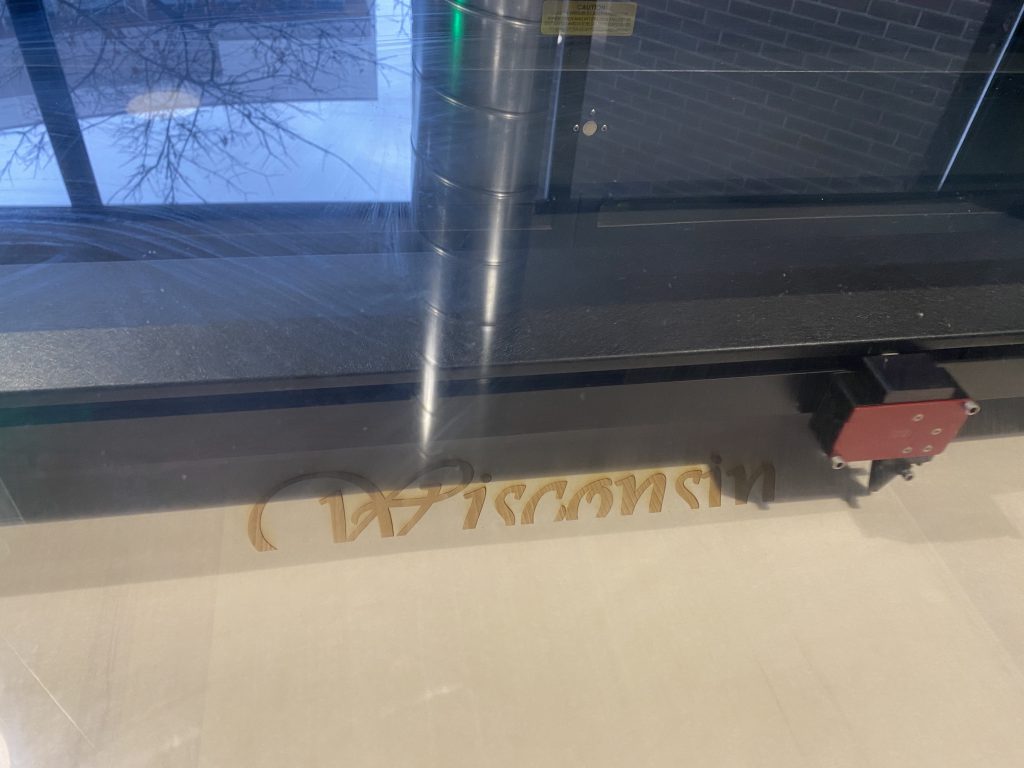
I really had to cross my fingers at this point, as I wasn’t sure if I would have problems with the ink bleeding under the tape. To mitigate that problem, I gave the text a couple of very light coats of shellac to (hopefully) seal the edges after the raster engraving was complete.
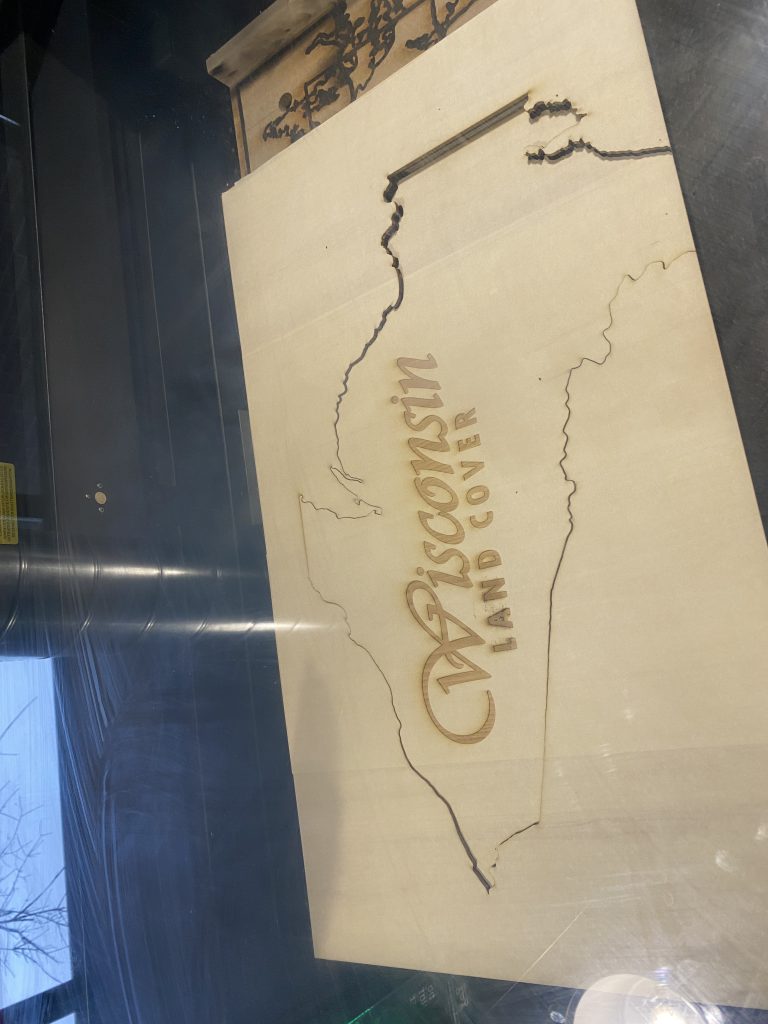
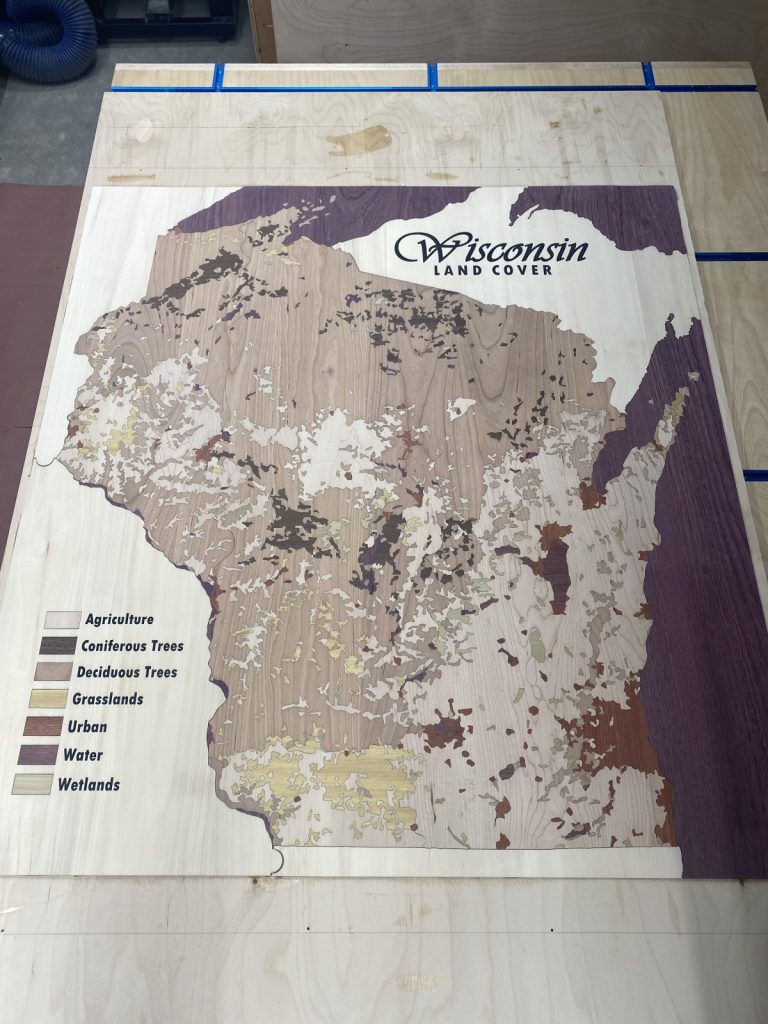
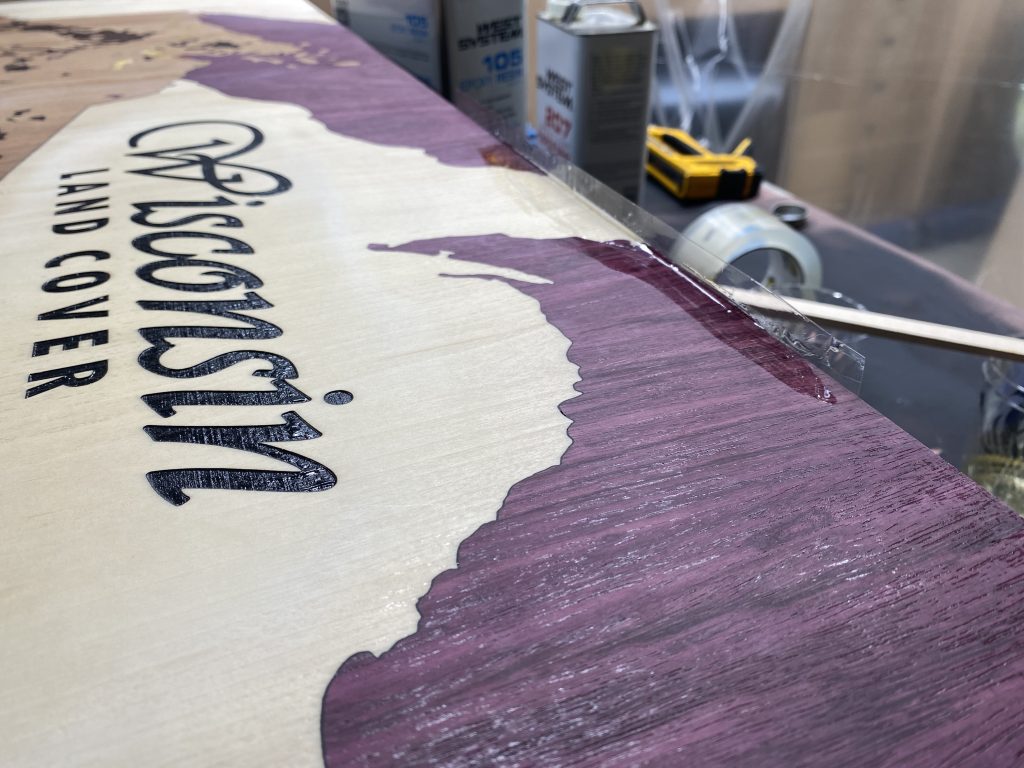
The final result. It turned out like I hoped. A little fuzziness in a few spots, but about as good as I could expect.
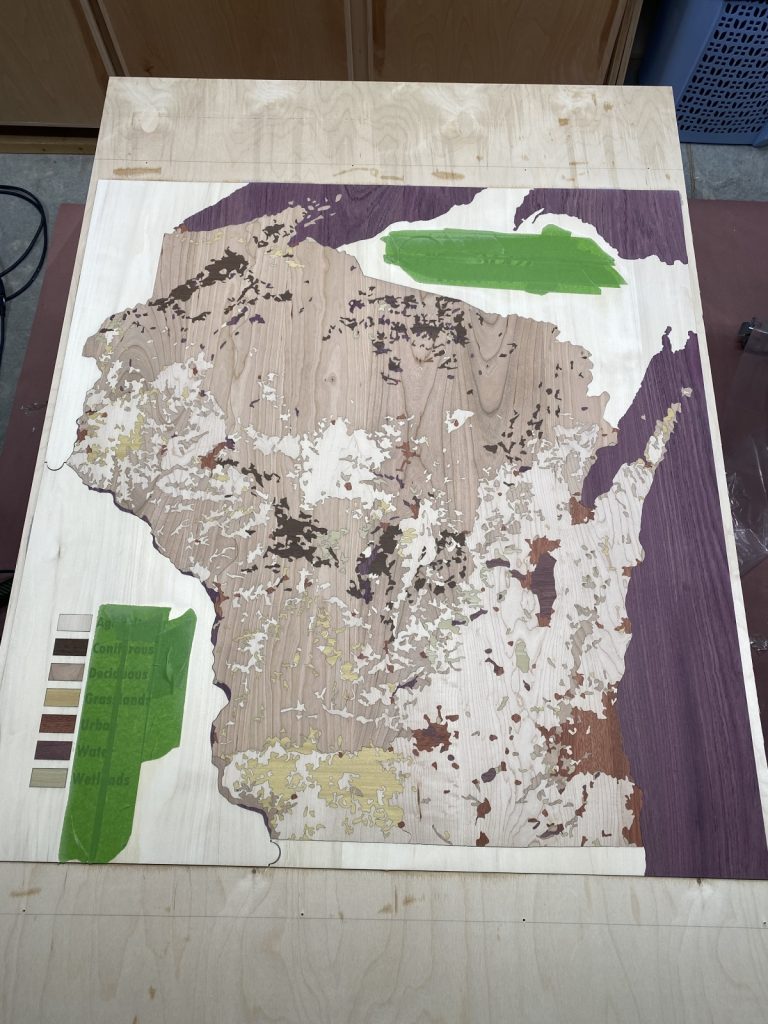
Starting to look like a map. This is before I sprayed the Marsh black aerosol ink. Things went on hold again in early summer 2021… warm weather generally bumps indoor projects for me!
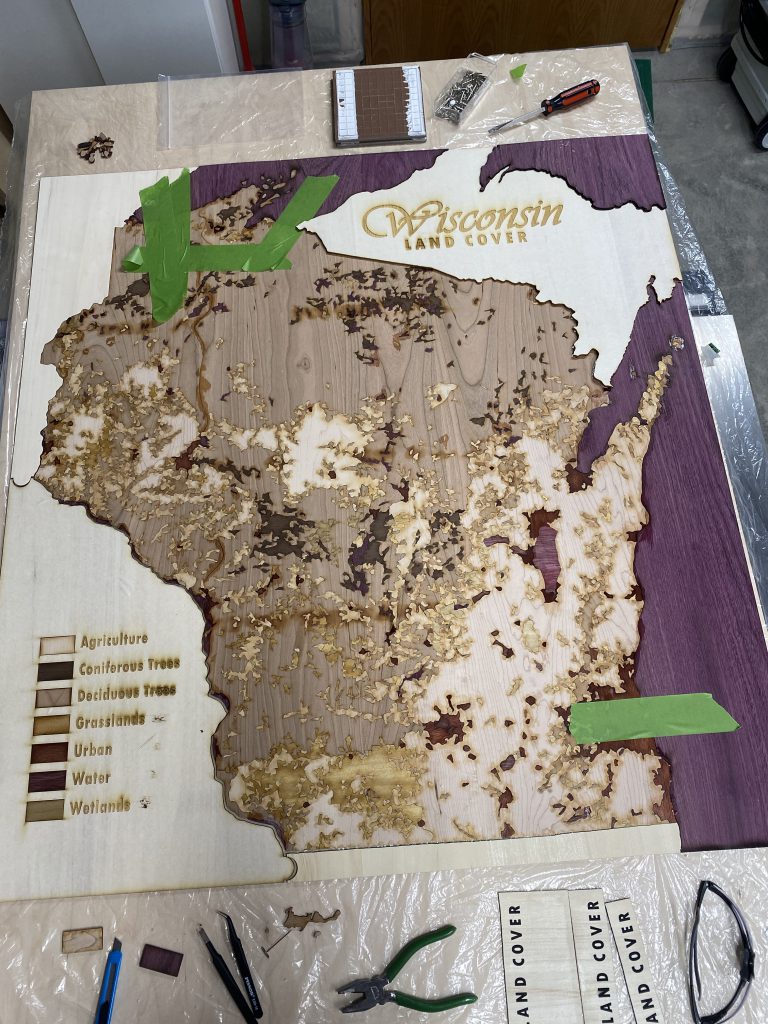
Assembly Complete. All of the pieces are in place. I covered everything in clear packing tape to hopefully keep things in place for the next steps.
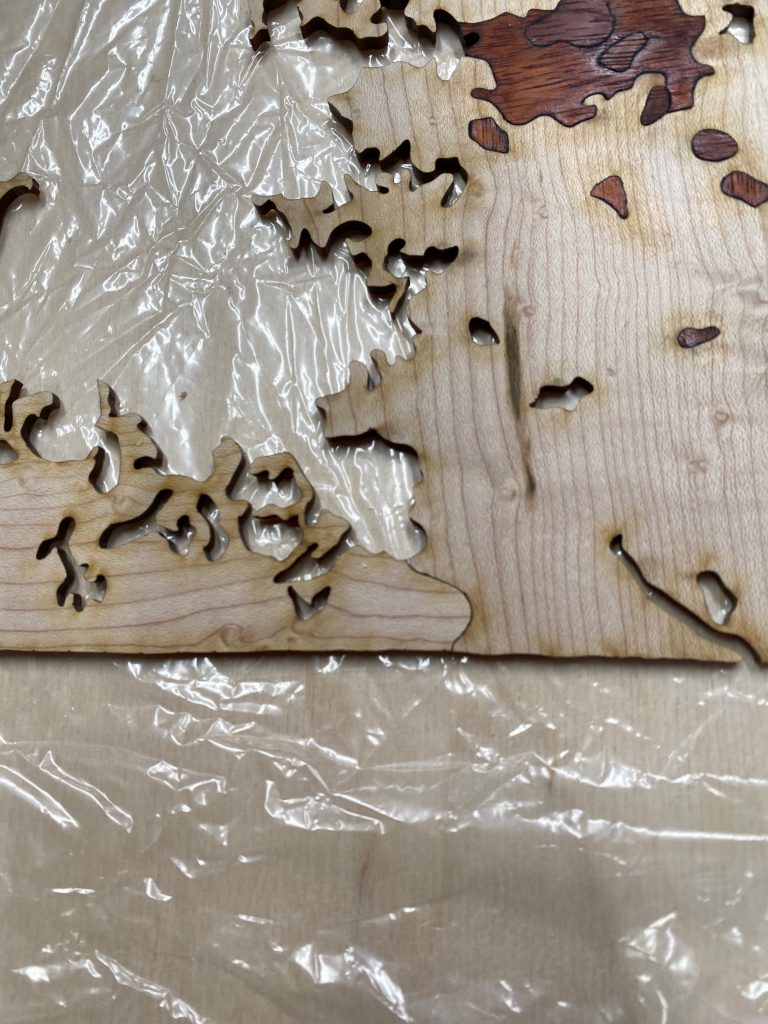
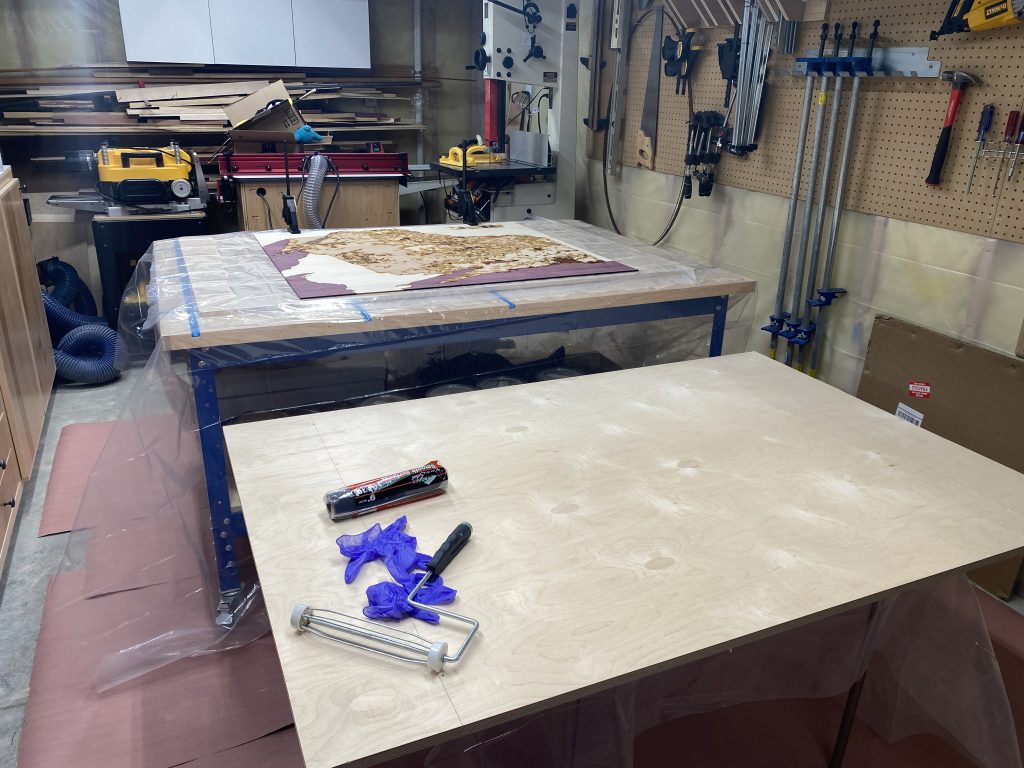
Prepping for the flip. My theory: cover the map with two layers of plastic to keep epoxy from leaking through and fusing two sheets of plywood together.
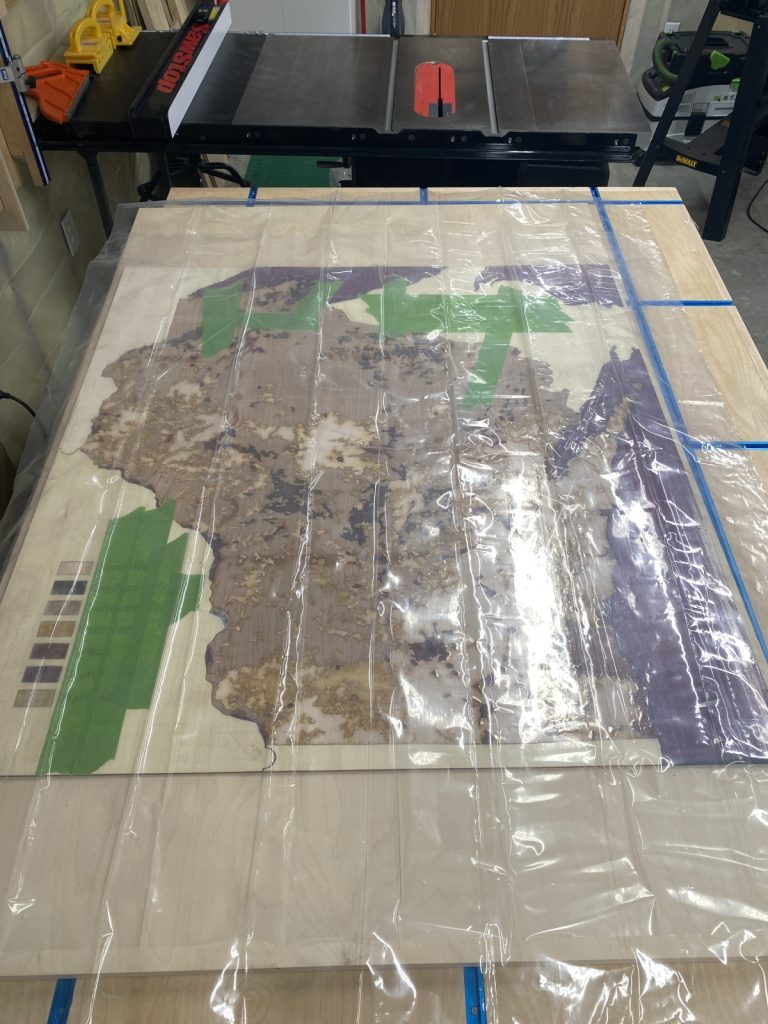
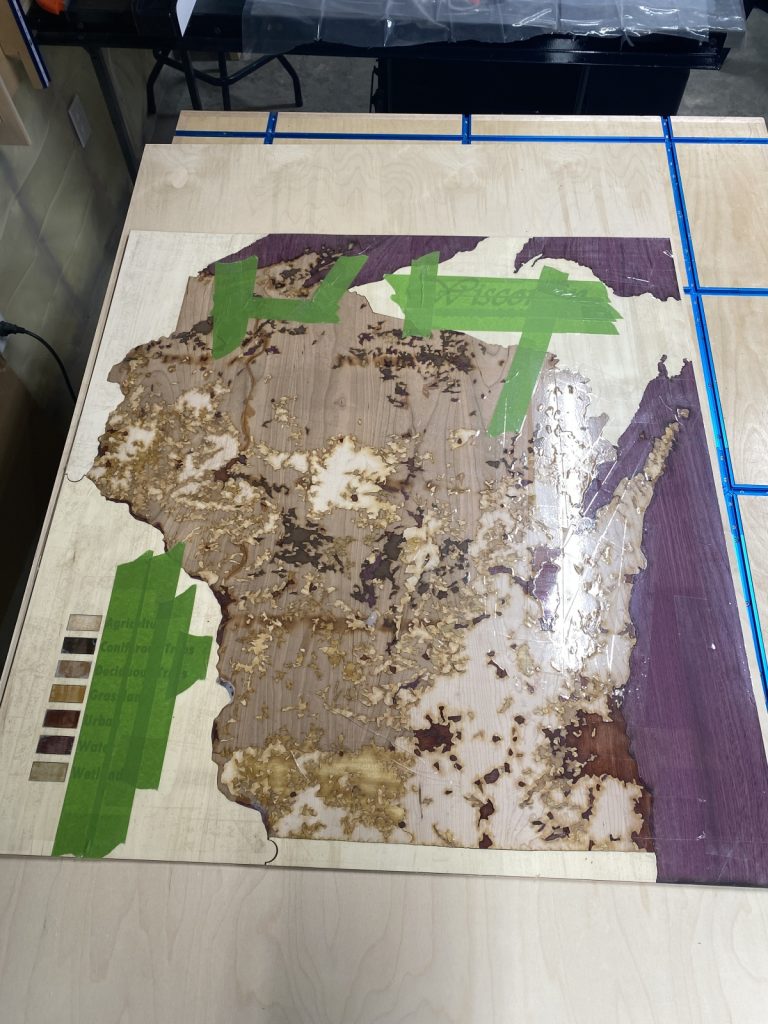
Almost ready for the flip. My scheme: I laid a 1/2 inch sheet of plywood over the top of the map, and screwed the two sheets together. Combined with all of the packing tape, this will keep all the pieces in place. Hopefully!
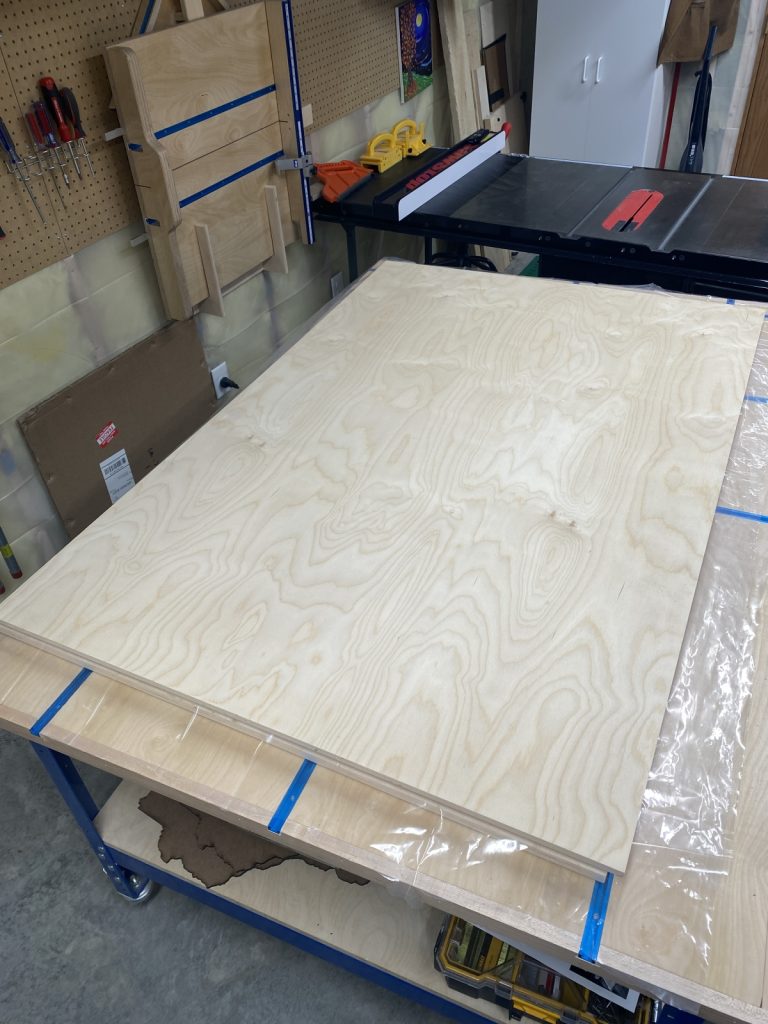
Flip complete. Everything stayed in place. I need to give the back a sanding to create a good surface for the next step.
Prepping for epoxy. I decided epoxy was 1) going to give me time to work compared to wood glue which sets too quickly, and 2) it would better fill in the various voids inherent to the puzzle pieces.
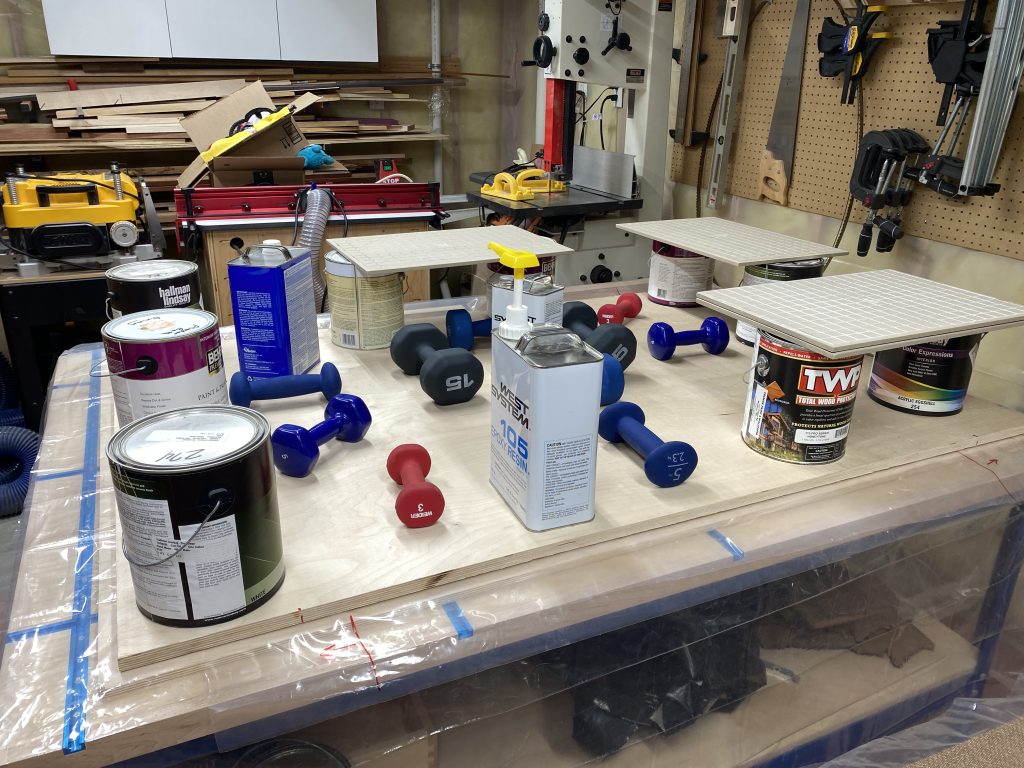
Base attached. My daughter helped me spread slow-curing epoxy all over the back of the map, then we carefully lifted the base into place and weighed it down with everything I could find!
The Unveiling. More epoxy leaked through to the opposite side than I was expecting. The epoxy also stuck more to the packing tape than I expected, making removal a pain. Honestly, I was a little worried it was ruined!
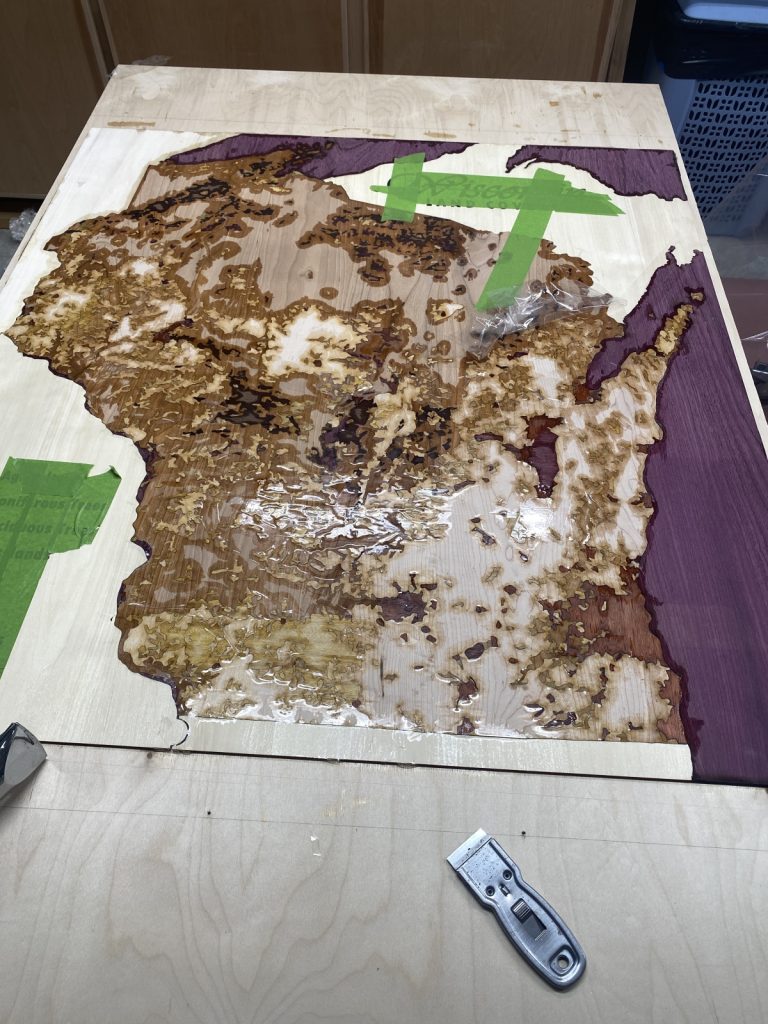
Sanding, Sanding, and more Sanding. I used 60 grit sandpaper in a random orbit sander to smooth things out and deal with the epoxy. Green tape is in place to protect lettering from sawdust and other crud.
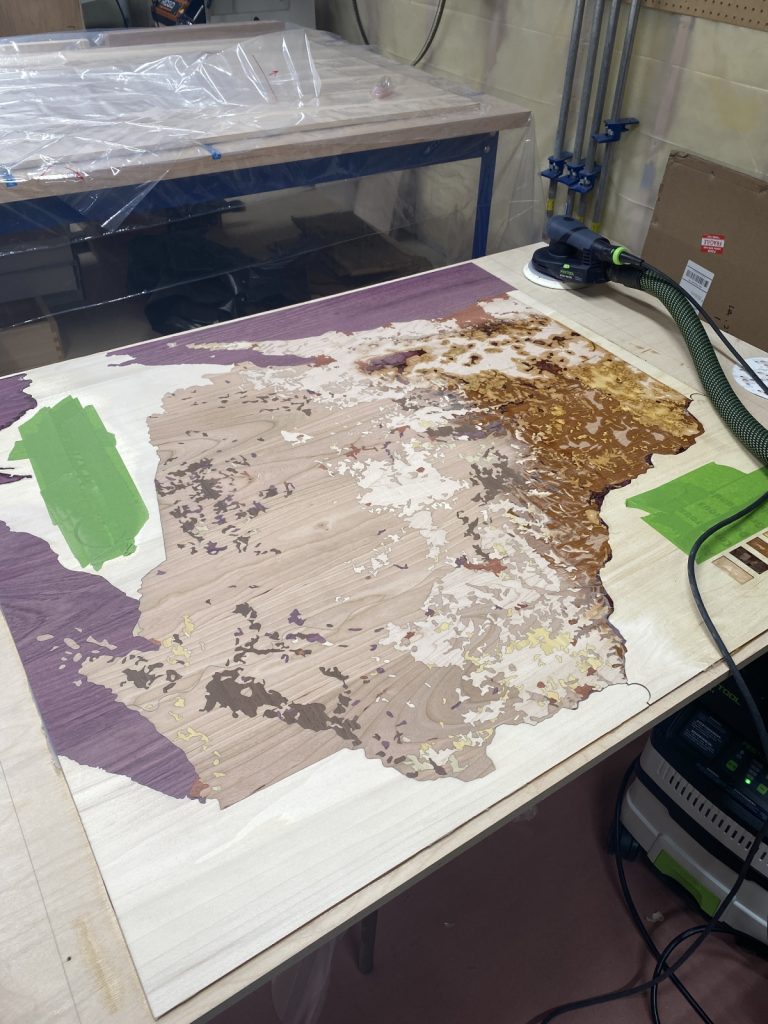
Sanding complete. Sanded to 220 grit. Time for cleanup, then finish.
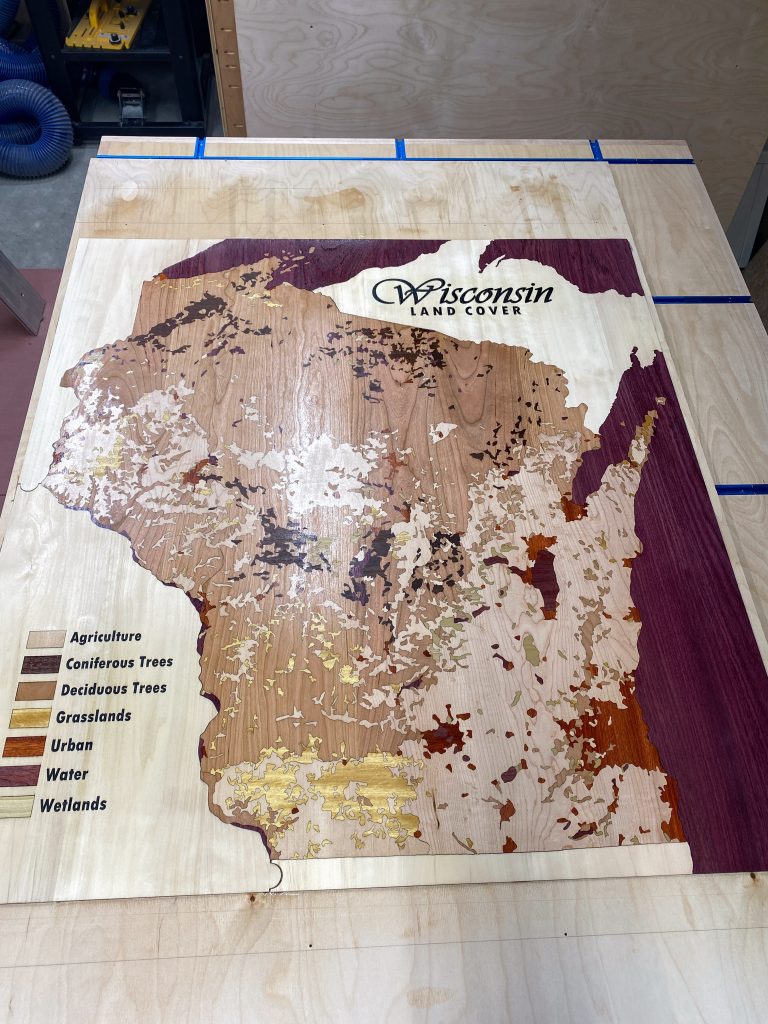
First coat of shellac. I opted for shellac in large part because it shouldn’t yellow over time, and because it doesn’t stink as bad as other products like lacquers. I was working indoors in the winter, so stink matters!
Frame assembled. The map itself has a couple of coats of shellac, but it needs several more to tidy up the appearance.
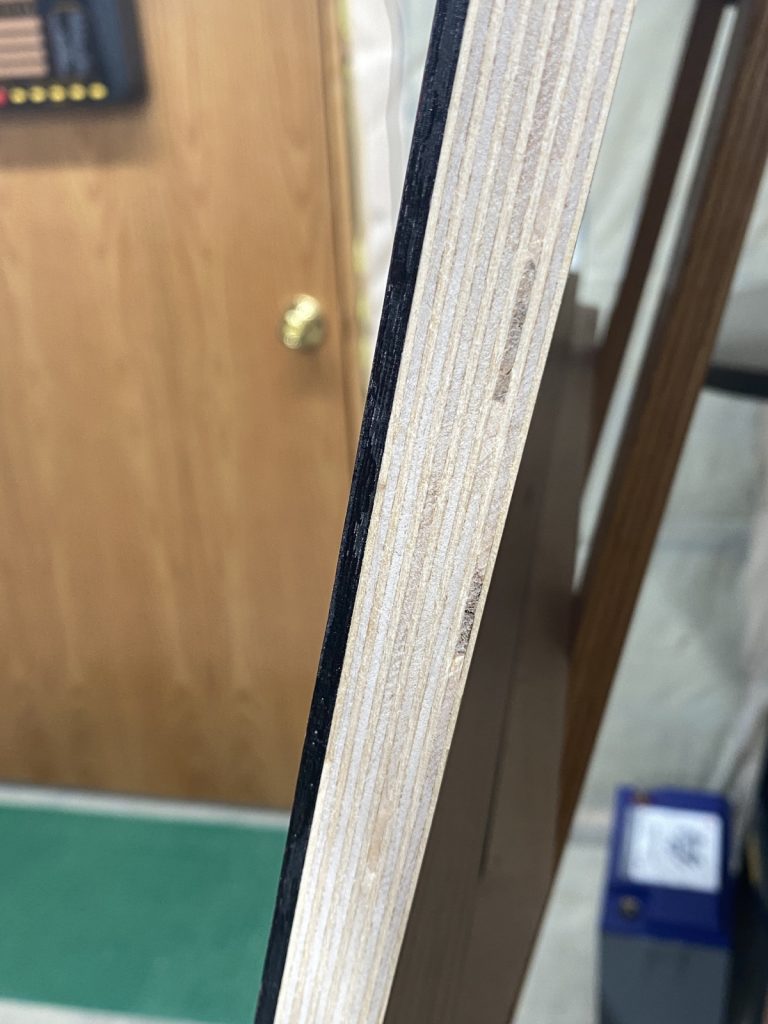
Layers. This gives you a sense of how thick the map is in relation to the baltic birch plywood base. After sanding, the map is about 1/8″ thick.
Oops. While trimming the map with a track saw, the blade kind of caught and took a chunk out of the surface. Epoxy to the rescue.
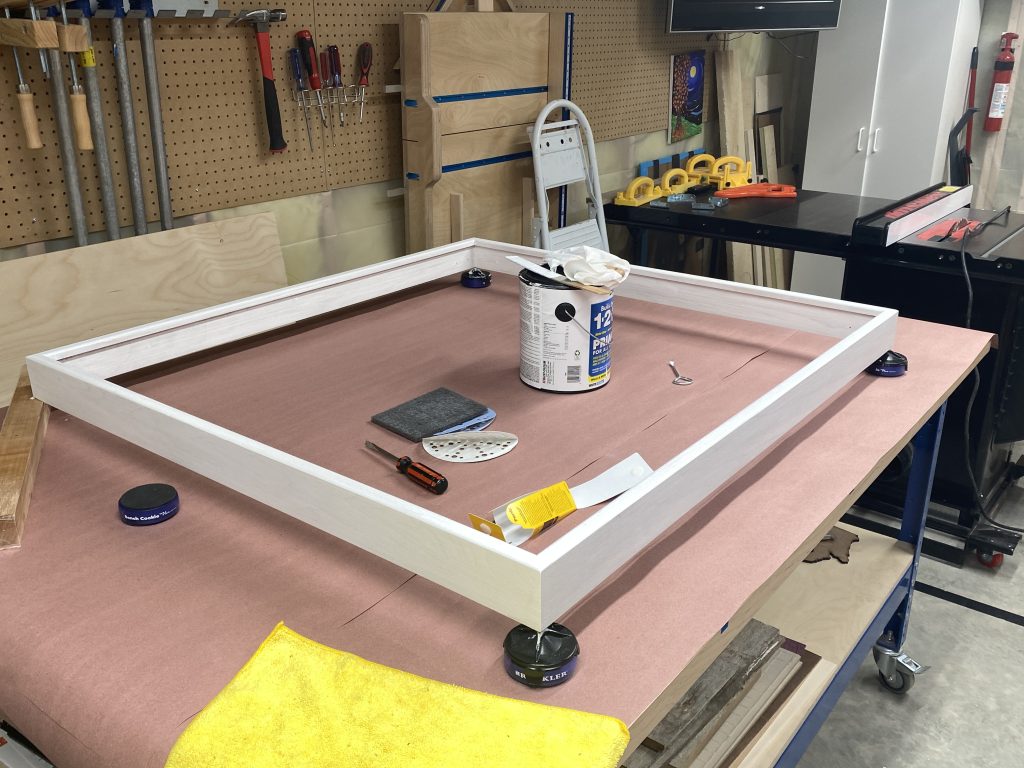
Frame construction. Now this is mostly a woodworking project! Frame is from poplar. I choose this because it’s knot-free and lighter (but less durable) than maple.
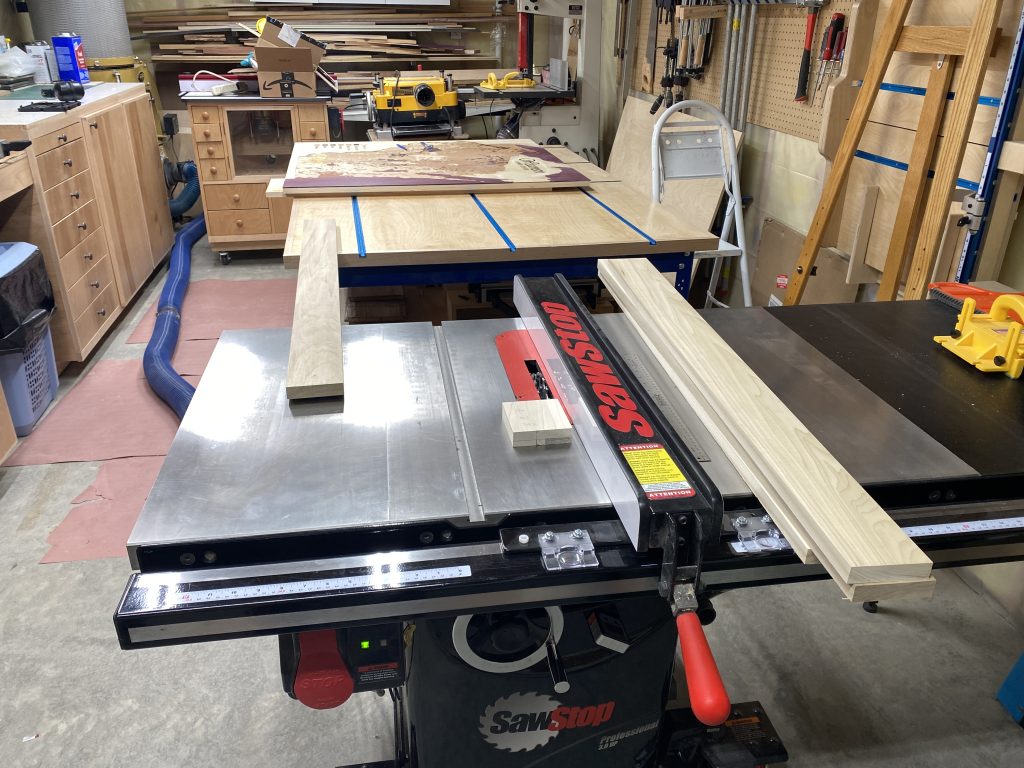
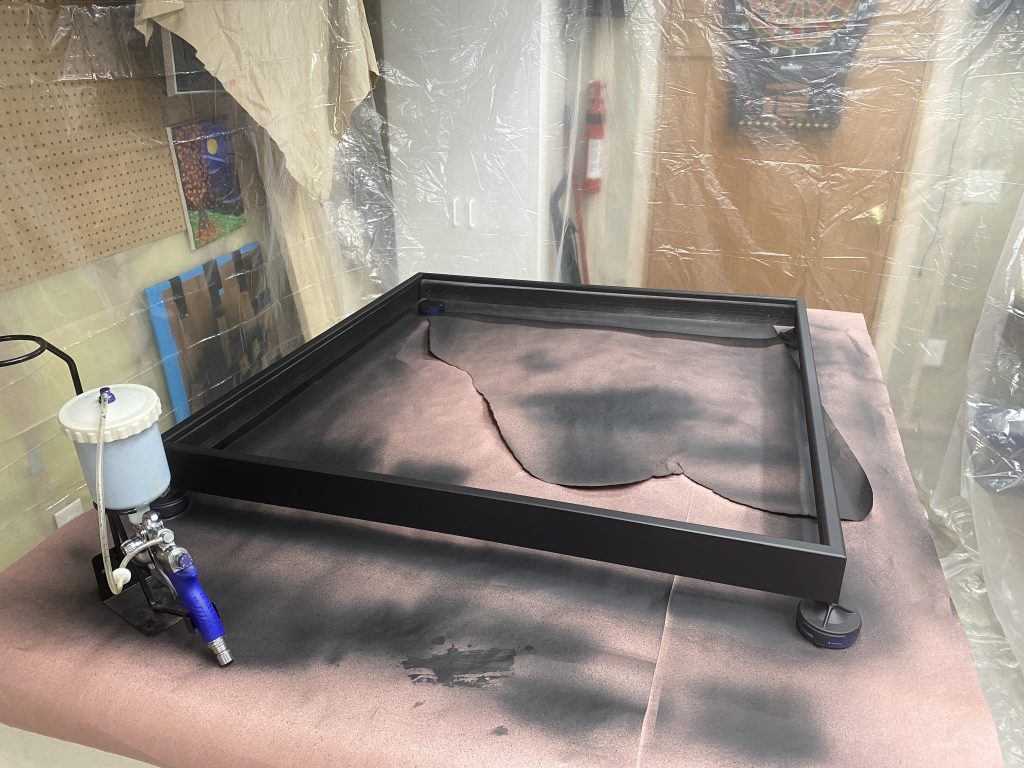
I prefer maple as my go-to, but the map was already getting very heavy. Needed to cut some weight! My plan is to paint the frame black.

Spraying is the way to go! But getting the paint thinned correctly, and setting the spray gun to avoid drips takes practice.
Hanging detail. I used a french cleat system on the back.

Finished!
August 2018 to February 2022. With lots of breaks, and a global pandemic that cut off my access to the makerspace for a long period of time!
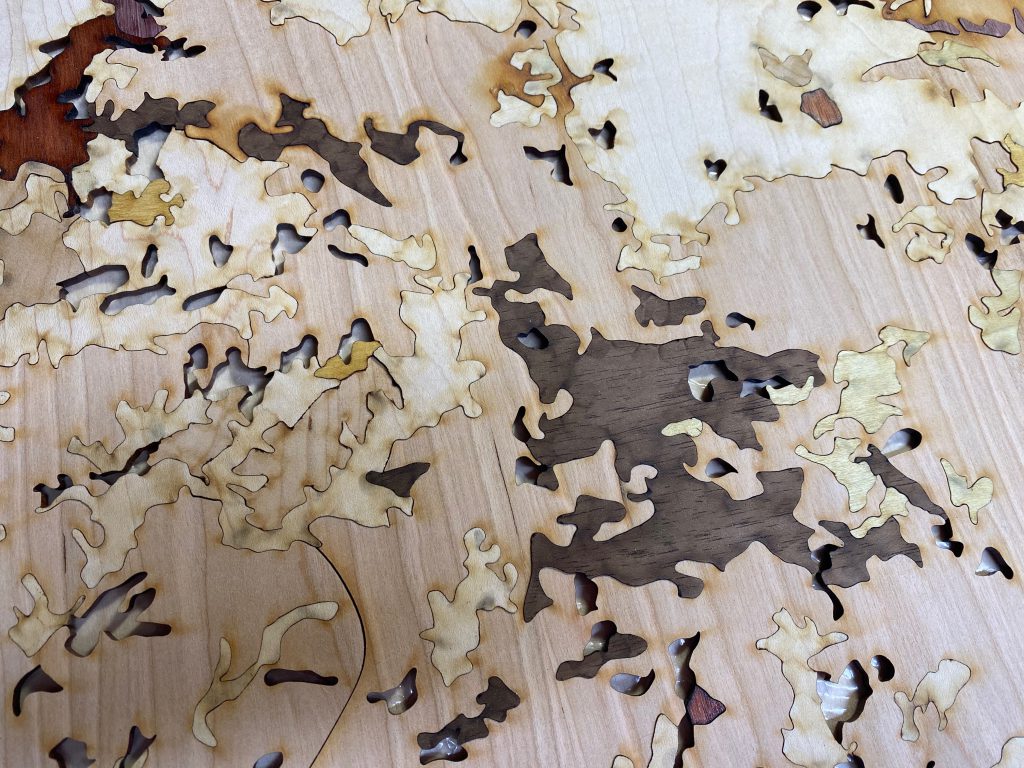
Close-up example of how the pieces came together.
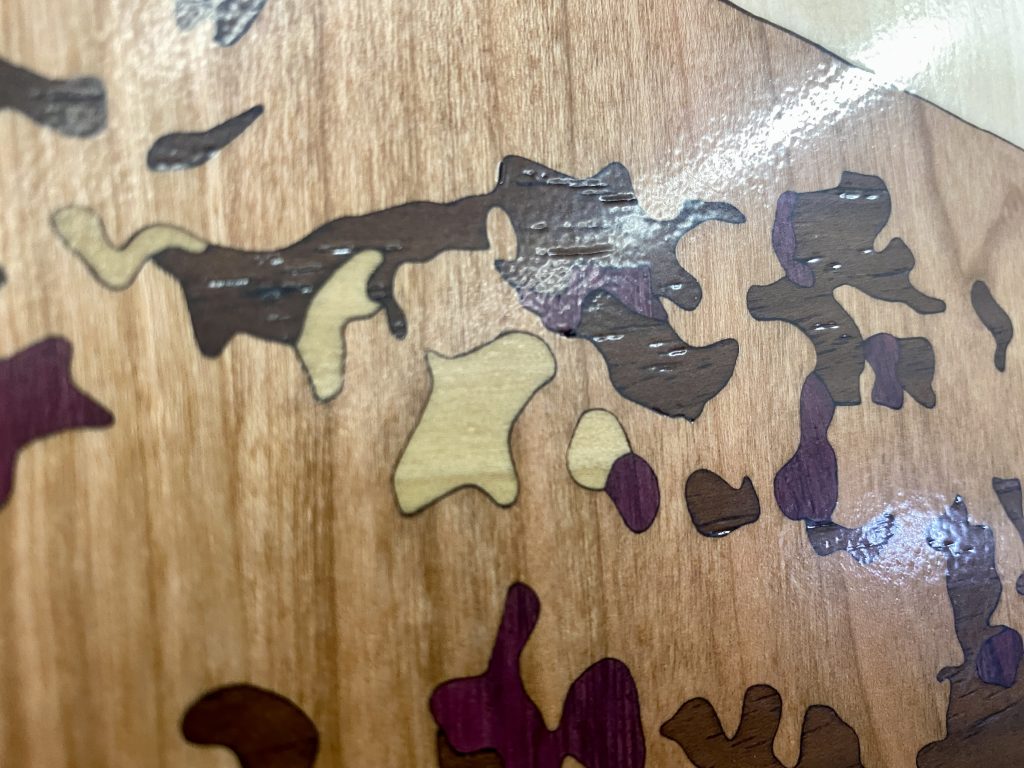
Quite a journey, and a lot learned in the process!
On display. I hauled the map to the 2022 WI Land Information Association annual conference in Elkhart Lake, WI. Photo Credit: Scott Daniel.
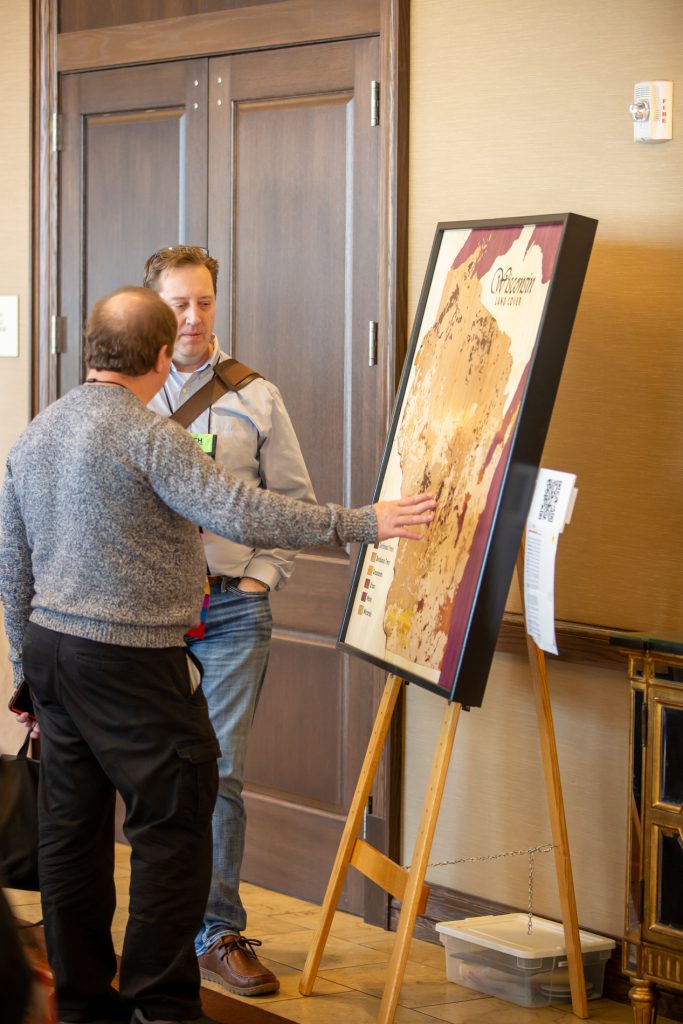
I appreciated the positive comments I got. This is a crowd that knows what goes into maps, wood and otherwise! Photo Credit: Scott Daniel
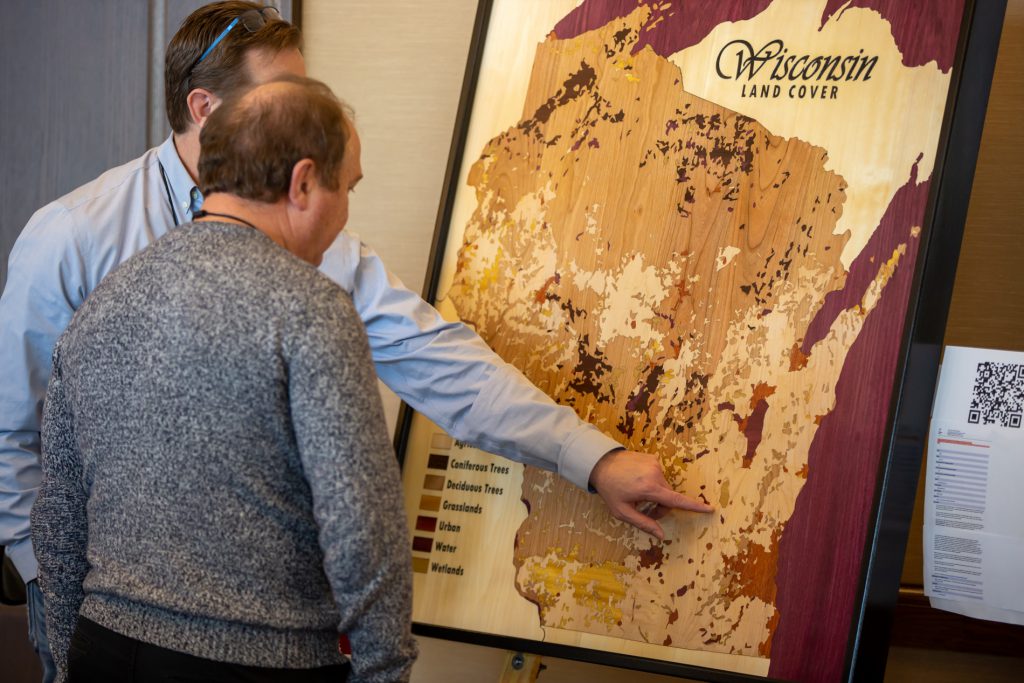
Award Winning. The map received three awards at the conference: “People’s Choice,” “President’s Choice”, and “Most Unique.” I didn’t set out to win any awards, but I appreciated the kudos!

Videos
Here are some random videos I captured during the process.